


Hughes H1 Build
 01-02-2017, 12:35 PM
#1

Thread Starter
My Feedback: (8)
Join Date: Jan 2010
Location: sherman, CT
Posts: 202
Likes: 0
Received 0 Likes
on
0 Posts
Hi Everyone,
I've decided to build a plane that I've always wanted. The Hughes h1 racer. I can't find a kit for it, and the only plans that I've found, are too small.
I did find a plan on Outerzone plans service by J.A devries that is a .60 size model with either a 60 1/2" long wing, or a 47 1/2" short wing. I downloaded the
plan, and with the help of my computer brilliant stepson, enlarged it, and will now build an 80" wing version, with a 66" fuse. It will be powered
by a Saito f60 r3 engine, will use a foam core wing that I will cut myself, and be constructed with balsa, ply and foam on the rest of the plane. I haven't
decided on a finish yet, but it will probably be a painted fuse with a monokoted wing, using the chrome on the bottom, and the royal blue on top. Retracts,
and split flaps will also be incorporated into the wing. I spoke with Craig from Fiberglass Specialties who can provide me with the cowl, I hope it will
work, it's a little smaller than the plan. So this past weekend I got started by purchasing some nice 1/4" hard balsa for the fuse sides, glued them up, and
added some 1/32" ply doublers in the front for some extra beefyness for that engine. Next, i'll start making all the bulkheads from 1/8" balsa...I'm looking
very forward to this build, as I love scratch building and the look and style of this airplane. Will keep you all posted!
Bob Lemay
 01-02-2017, 05:35 PM
#2
Thread Starter
My Feedback: (8)
Join Date: Jan 2010
Location: sherman, CT
Posts: 202
Likes: 0
Received 0 Likes
on
0 Posts
ok so just a few more pictures...
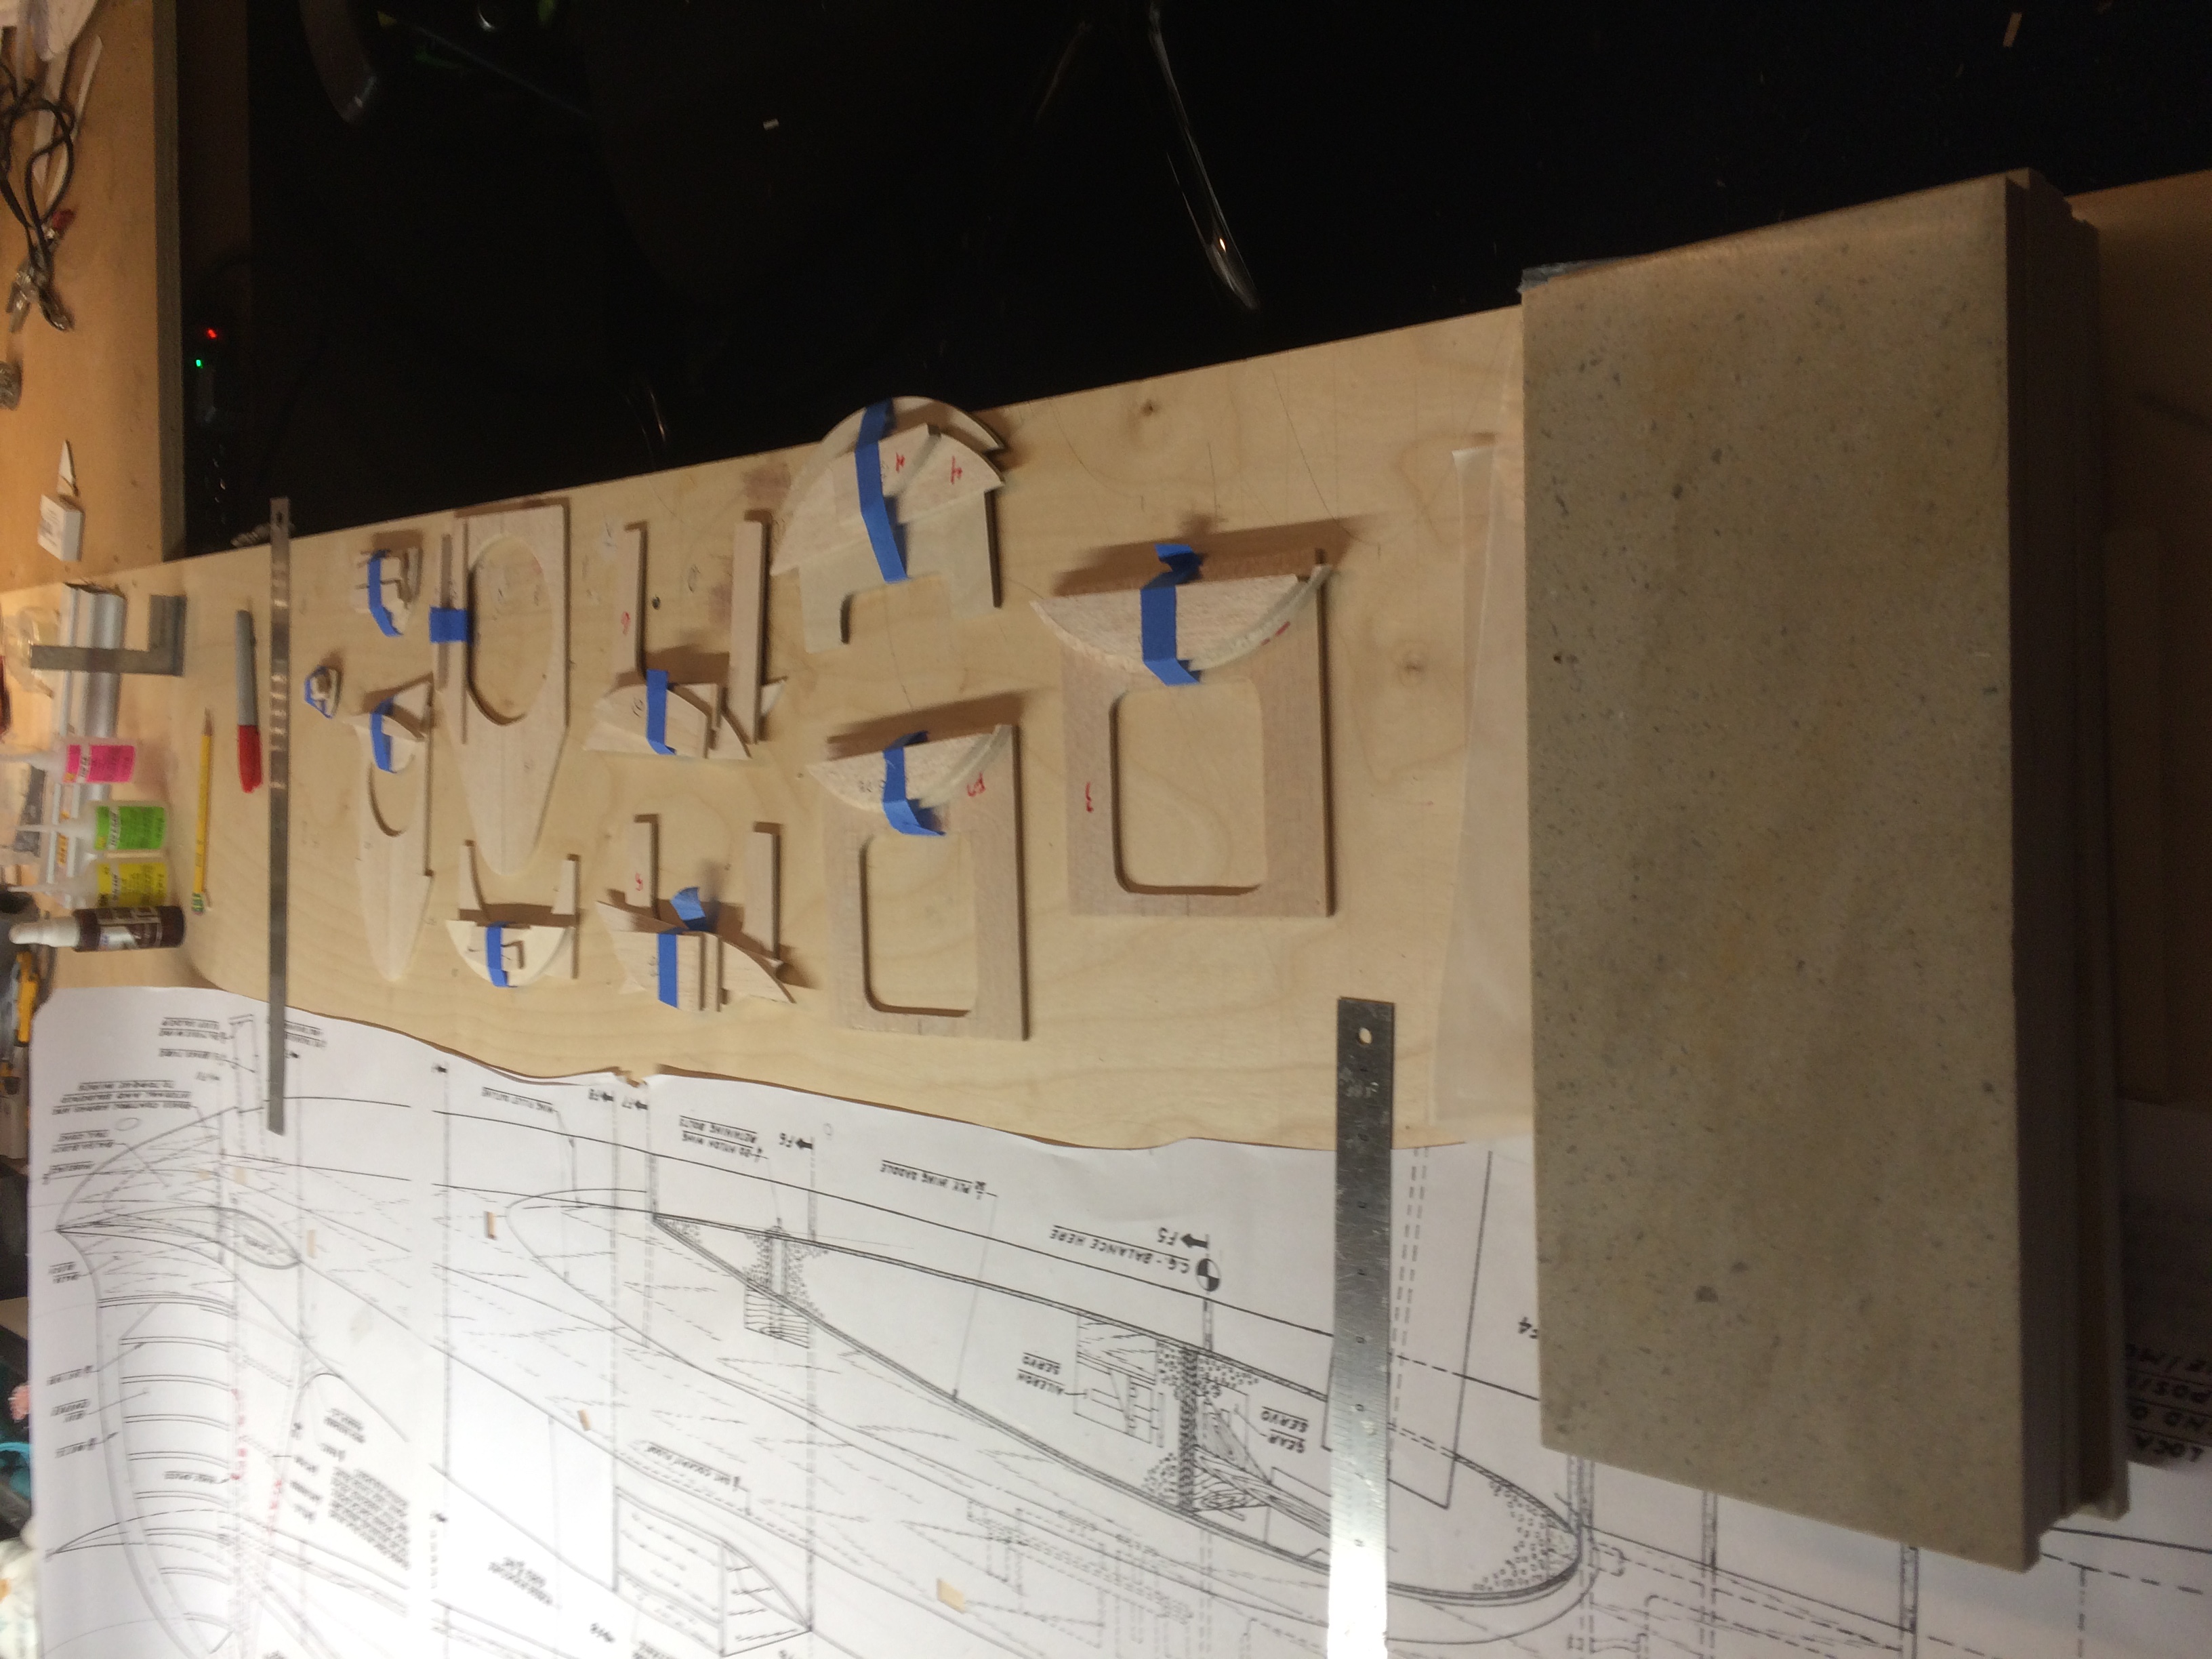
I laid out and cut the wing and stab tips and roots for the hot wire, and started on the process of making the bulkheads.
Used a sharp pencil to poke dots around the paper templates which are taped to the balsa. i put 2 together where
they need to be symmetrical, left, rights, tops,bottoms. Cut them on the scroll saw, then to the horizontal belt sander
.
Last edited by rj lemay; 01-02-2017 at 05:42 PM.
01-04-2017, 05:19 PM
#3
Thread Starter
My Feedback: (8)
Join Date: Jan 2010
Location: sherman, CT
Posts: 202
Likes: 0
Received 0 Likes
on
0 Posts
Hi again!
So for the past 2 days, i've been hand tracing and cutting all of the formers. This requires a trip, per piece, to the downstairs garage, to use the sander and chop saw.
My very understanding wife, who allows scratch and kit building in the livingroom, draws the line at those two tools. The scroll saw is ok in there, just not the other two!
Anyway, I think they came out pretty well, it gets a little tough when you enlarge a plan, the ink lines distort a bit, making it difficult trace and make everything to the required size.
All of the formers are made up of 5 seperate pieces. The firewall will be a laminated piece of 1/4" and !/8" ply, which is under that 6 layer stack of 1/2' corian pieces. I work in a
commercial cabinetry shop, and use the scrap corian in many different ways during building.
Next up will be constructing the fuse, then figuring out how to build the fin and rudder. There was no template drawing or top rib view on the plan for either, so I think I'm
just going to try to wing it.(no pun intended) The stab's root airfoil is pretty close to length of the fin and rudder combined at the root, so I'll start there. I'll just need to figure
out a top airfoil pattern, then fill in between the two. O.k I guess that's all for now...
01-05-2017, 01:47 PM
#4


Great subject, RJ. I was able to see the original on display at the Smithsonian Air & Space Museum. It's really an exemplary subject from the Golden Age.
You evidently have equally good taste in women given your wife allows building in the living room, she sounds like a keeper.
You evidently have equally good taste in women given your wife allows building in the living room, she sounds like a keeper.
 01-05-2017, 05:35 PM
#6
Thread Starter
My Feedback: (8)
Join Date: Jan 2010
Location: sherman, CT
Posts: 202
Likes: 0
Received 0 Likes
on
0 Posts
thanks T.C
Yes she is a keeper indeed! Very supportive, and never questions anything about the hobby! I have always admired the Golden Age aircraft, especially the H1, and the Gee Bee R2.
I just finished a Hostetler 1/4 scale R2, before embarking on this project. I saw the H1 also in the movie, The Aviator, and knew that someday I would have to build one. The youtube video
of the team, led by Joe Bock, who constructed the 1/2 scale version for that movie is great! Have to get to the Smithsonian one day to see that original!
Have a good night, Bob
Yes she is a keeper indeed! Very supportive, and never questions anything about the hobby!
I have always admired the Golden Age aircraft, especially the H1, and the Gee Bee R2.I just finished a Hostetler 1/4 scale R2, before embarking on this project. I saw the H1 also in the movie, The Aviator, and knew that someday I would have to build one. The youtube video
of the team, led by Joe Bock, who constructed the 1/2 scale version for that movie is great! Have to get to the Smithsonian one day to see that original!
Have a good night, Bob
01-06-2017, 06:01 PM
#7
Thread Starter
My Feedback: (8)
Join Date: Jan 2010
Location: sherman, CT
Posts: 202
Likes: 0
Received 0 Likes
on
0 Posts
Hi Guys
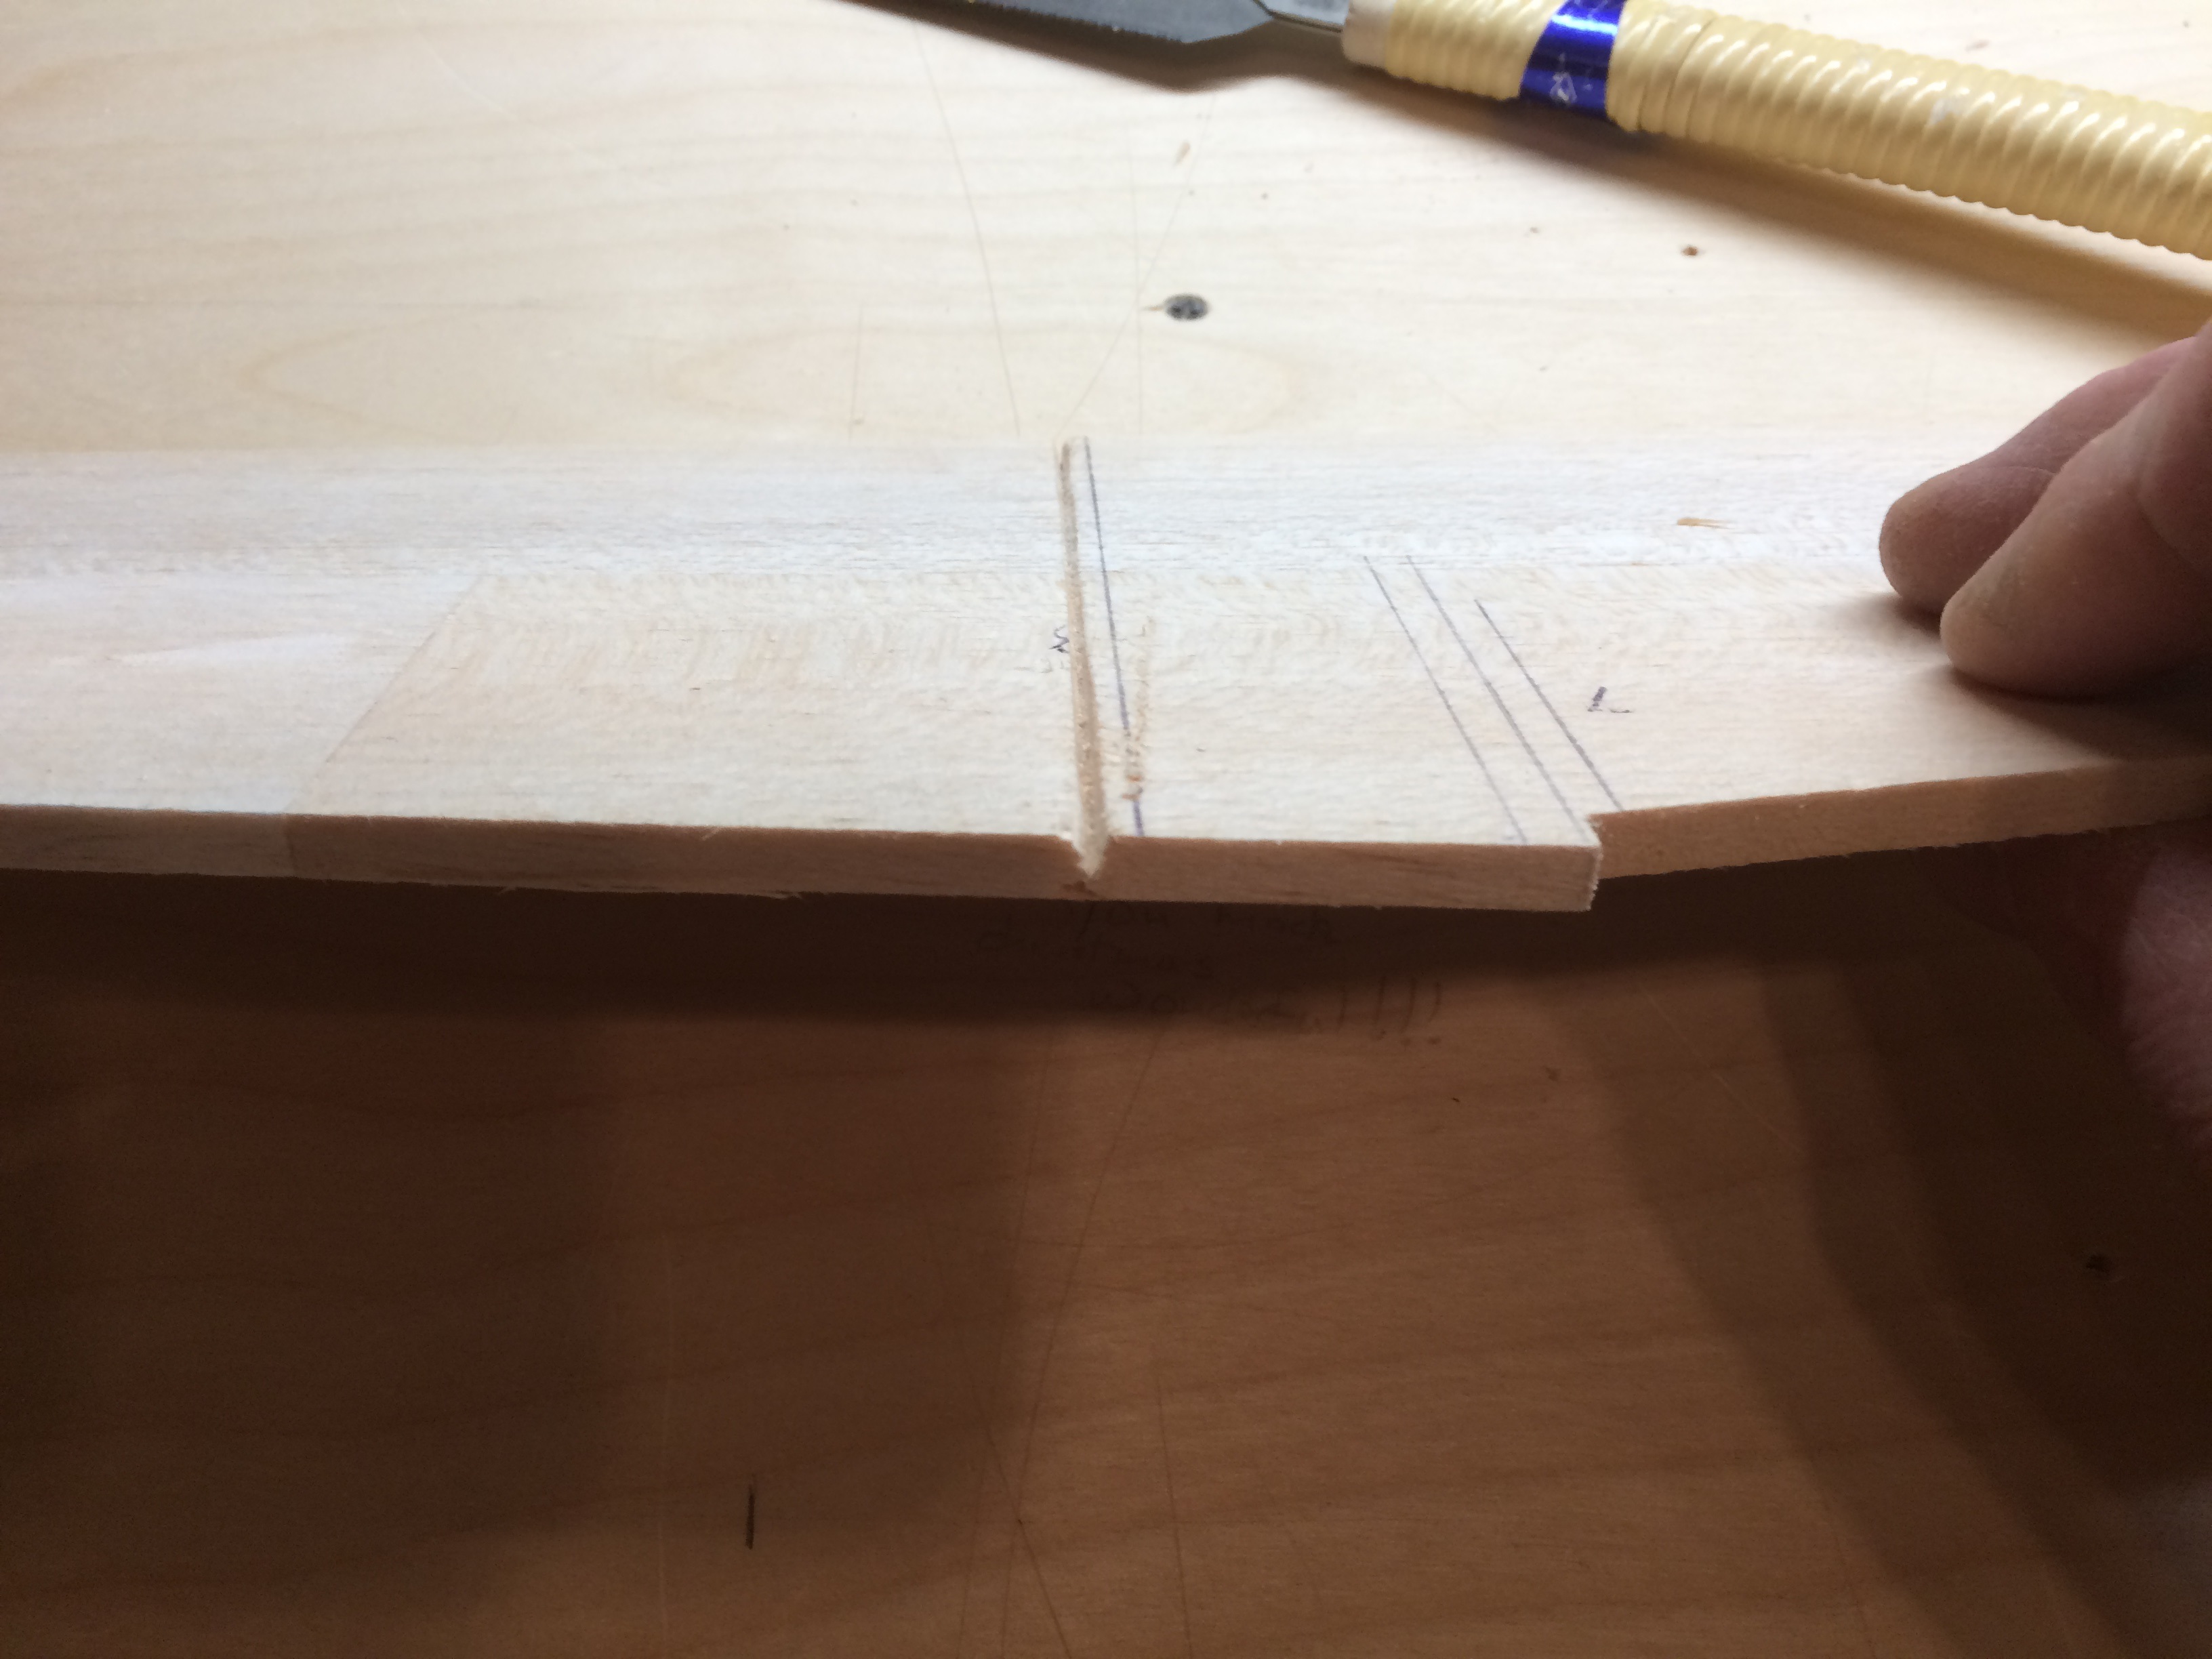
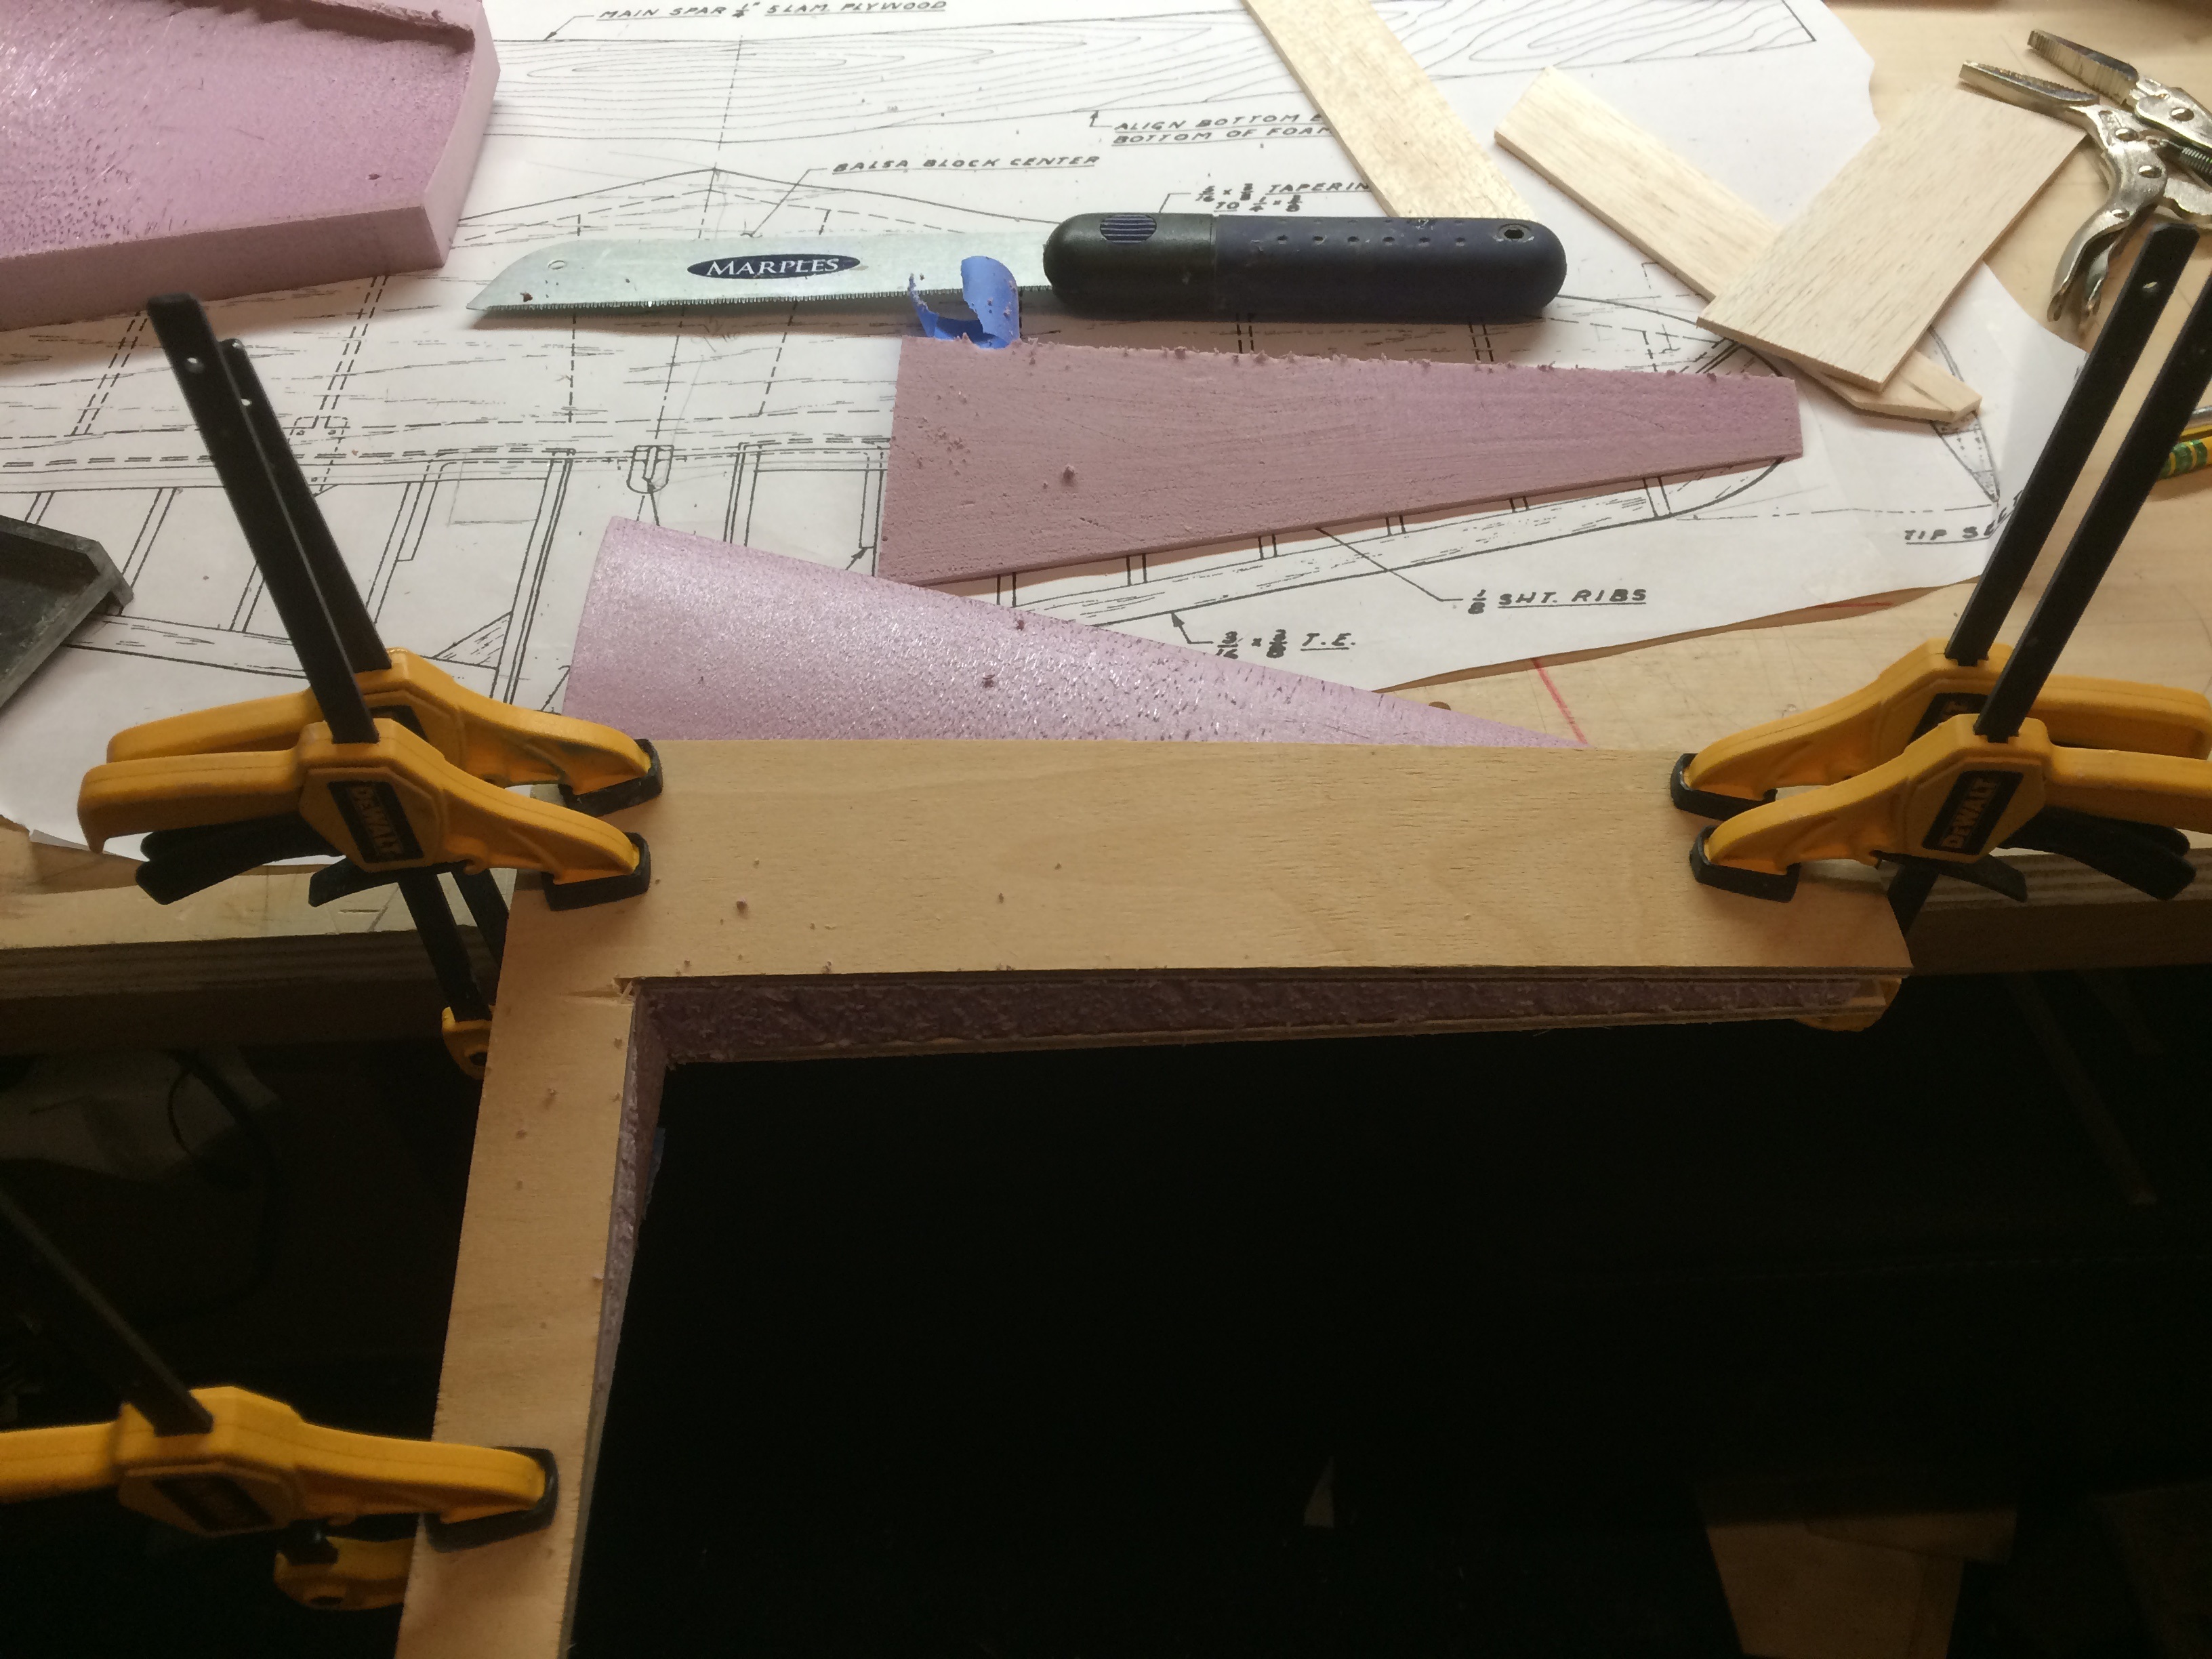
Just a few more pictures of the progress... One is cutting a small v groove at former 8 to be able to make the required angle, the v groove, and the formers installed.
Next will be constructing the stab and fin, so i can install pushrods before it's all closed up. Polystyrene foam will be installed between the round formers, then
sanded to shape. It's a method of building that I've never used before, but I think it should work great! So off to the Depot tomorrow to buy some foam, then
to gather all that will be needed to construct the hot wire, and its bow!
Bob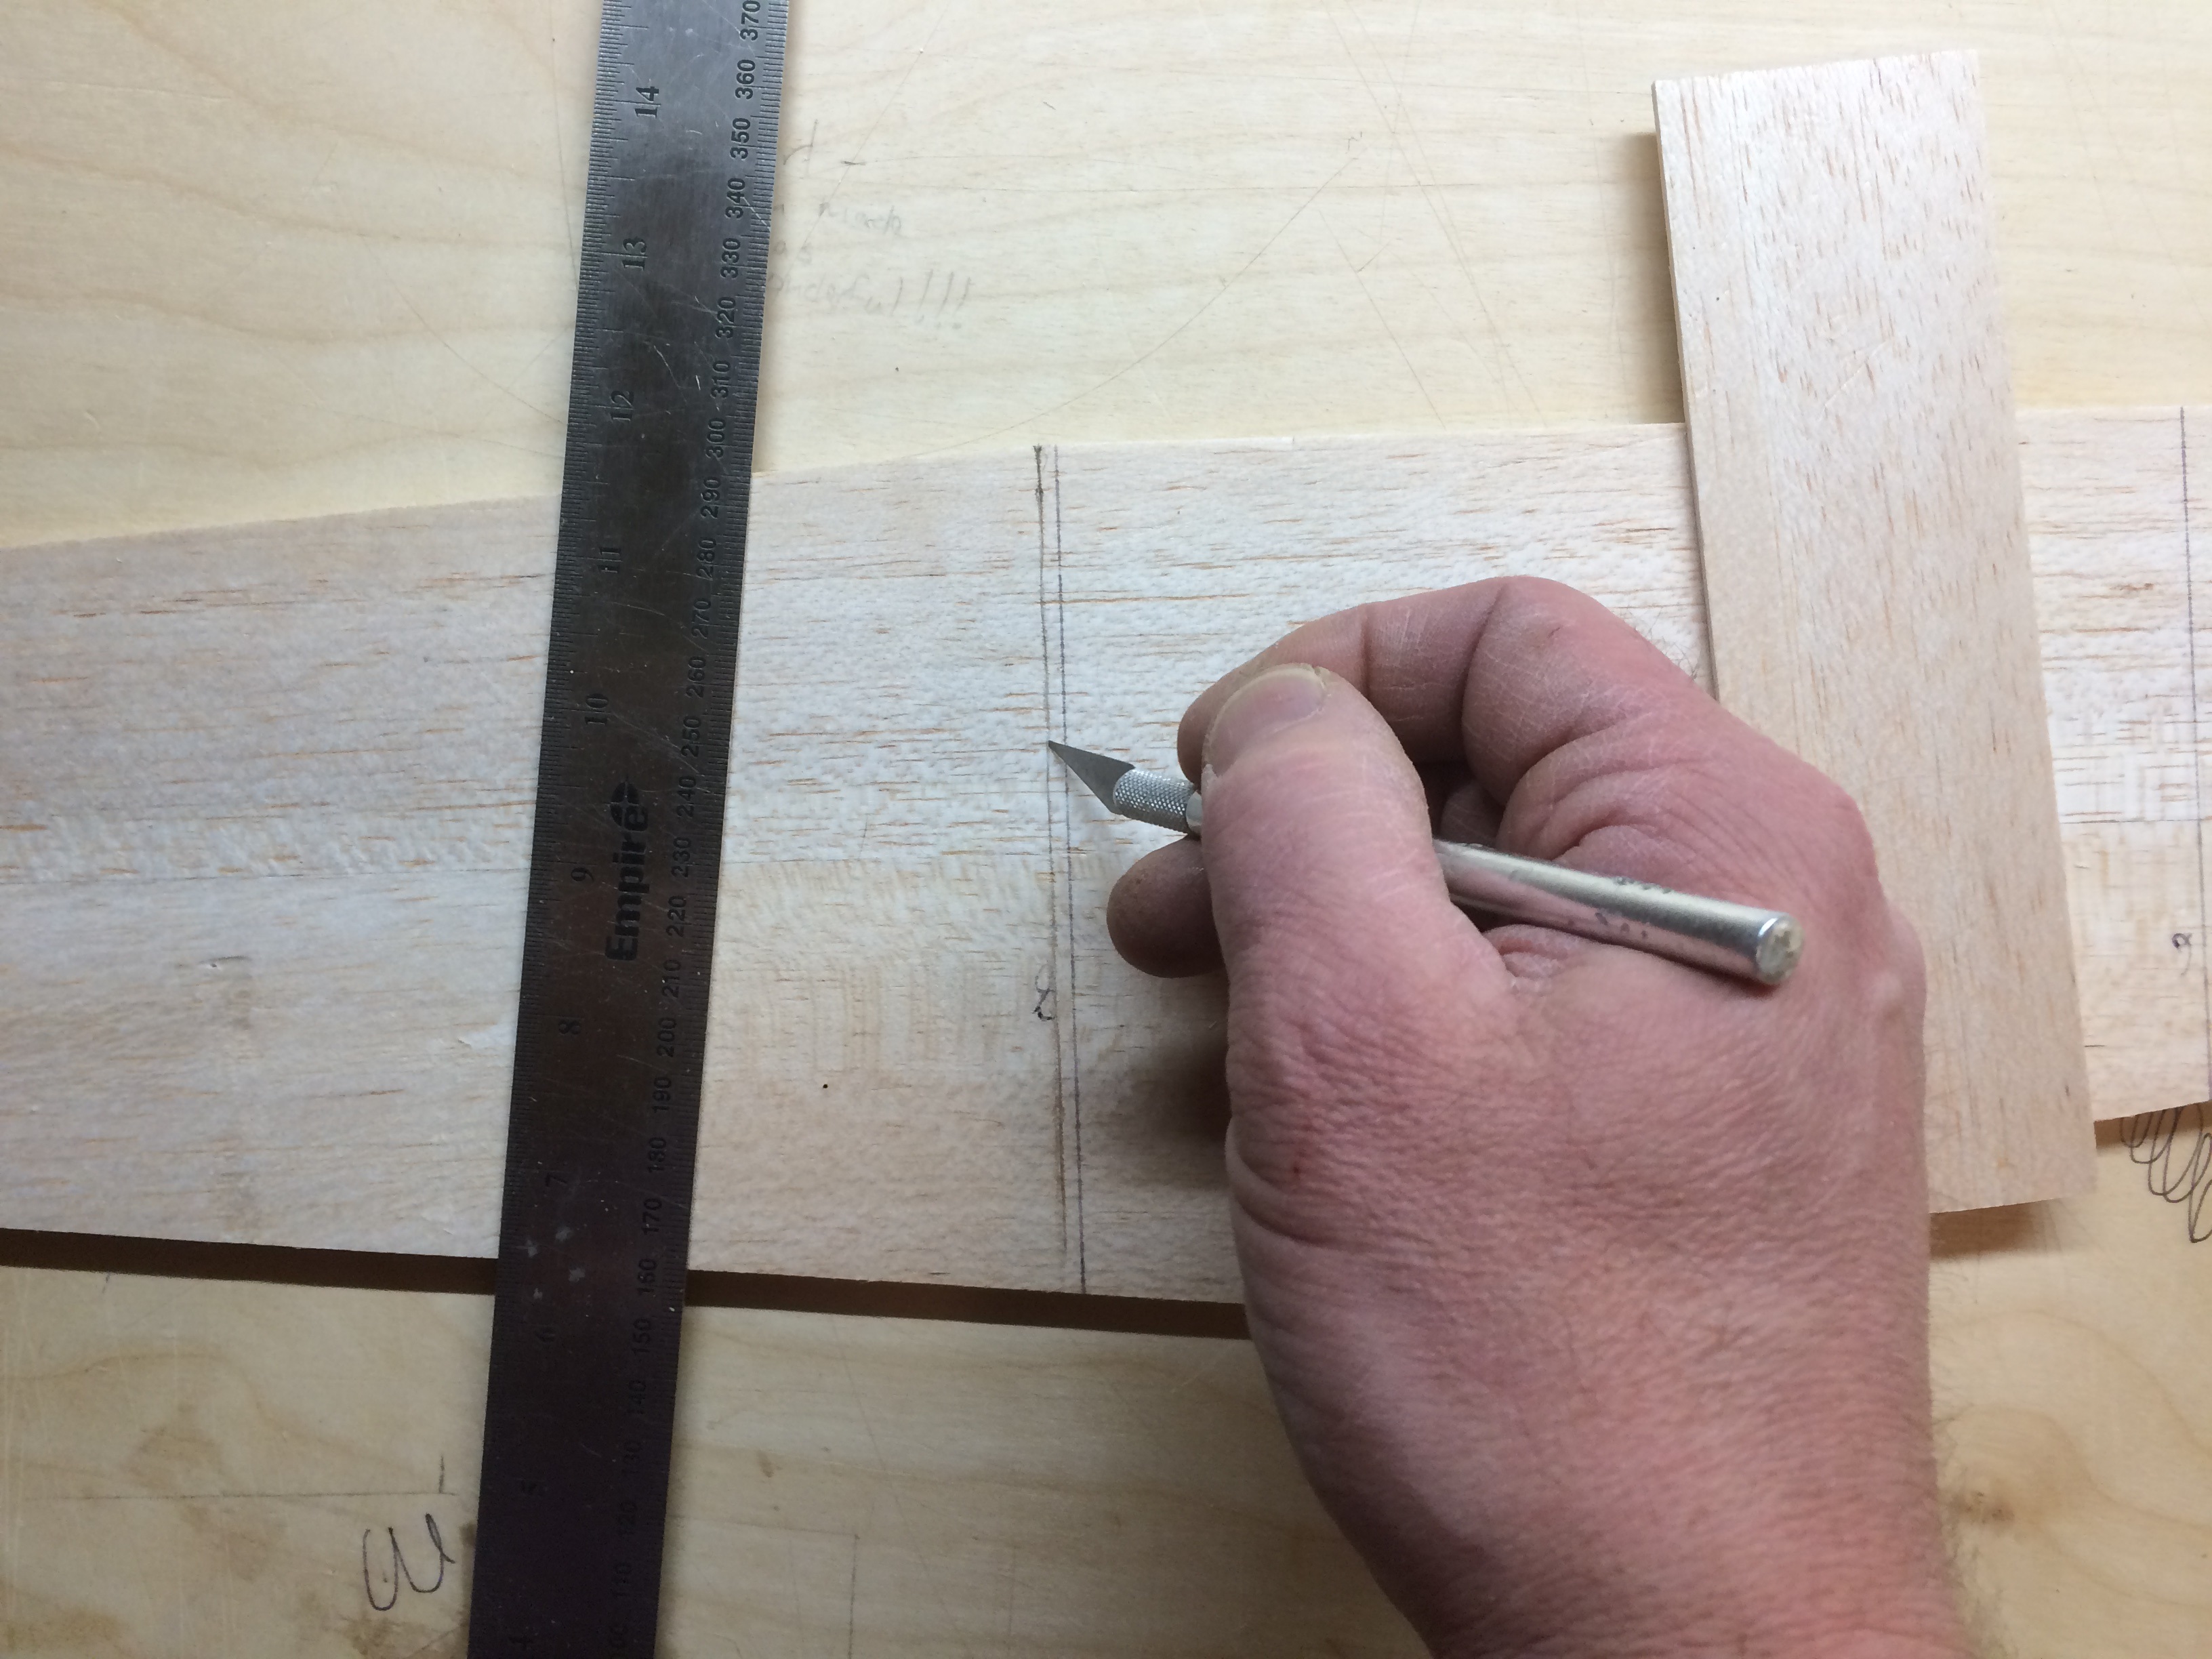
Last edited by rj lemay; 01-06-2017 at 06:06 PM.
01-07-2017, 05:37 PM
#11
Thread Starter
My Feedback: (8)
Join Date: Jan 2010
Location: sherman, CT
Posts: 202
Likes: 0
Received 0 Likes
on
0 Posts
Hi T.C,
Yes they are extremely handy and very easy to make. A few pieces of ply cut to the height you need and some pipe insulation. They really save your new fuselage
from dings, and breaking of bulkheads!
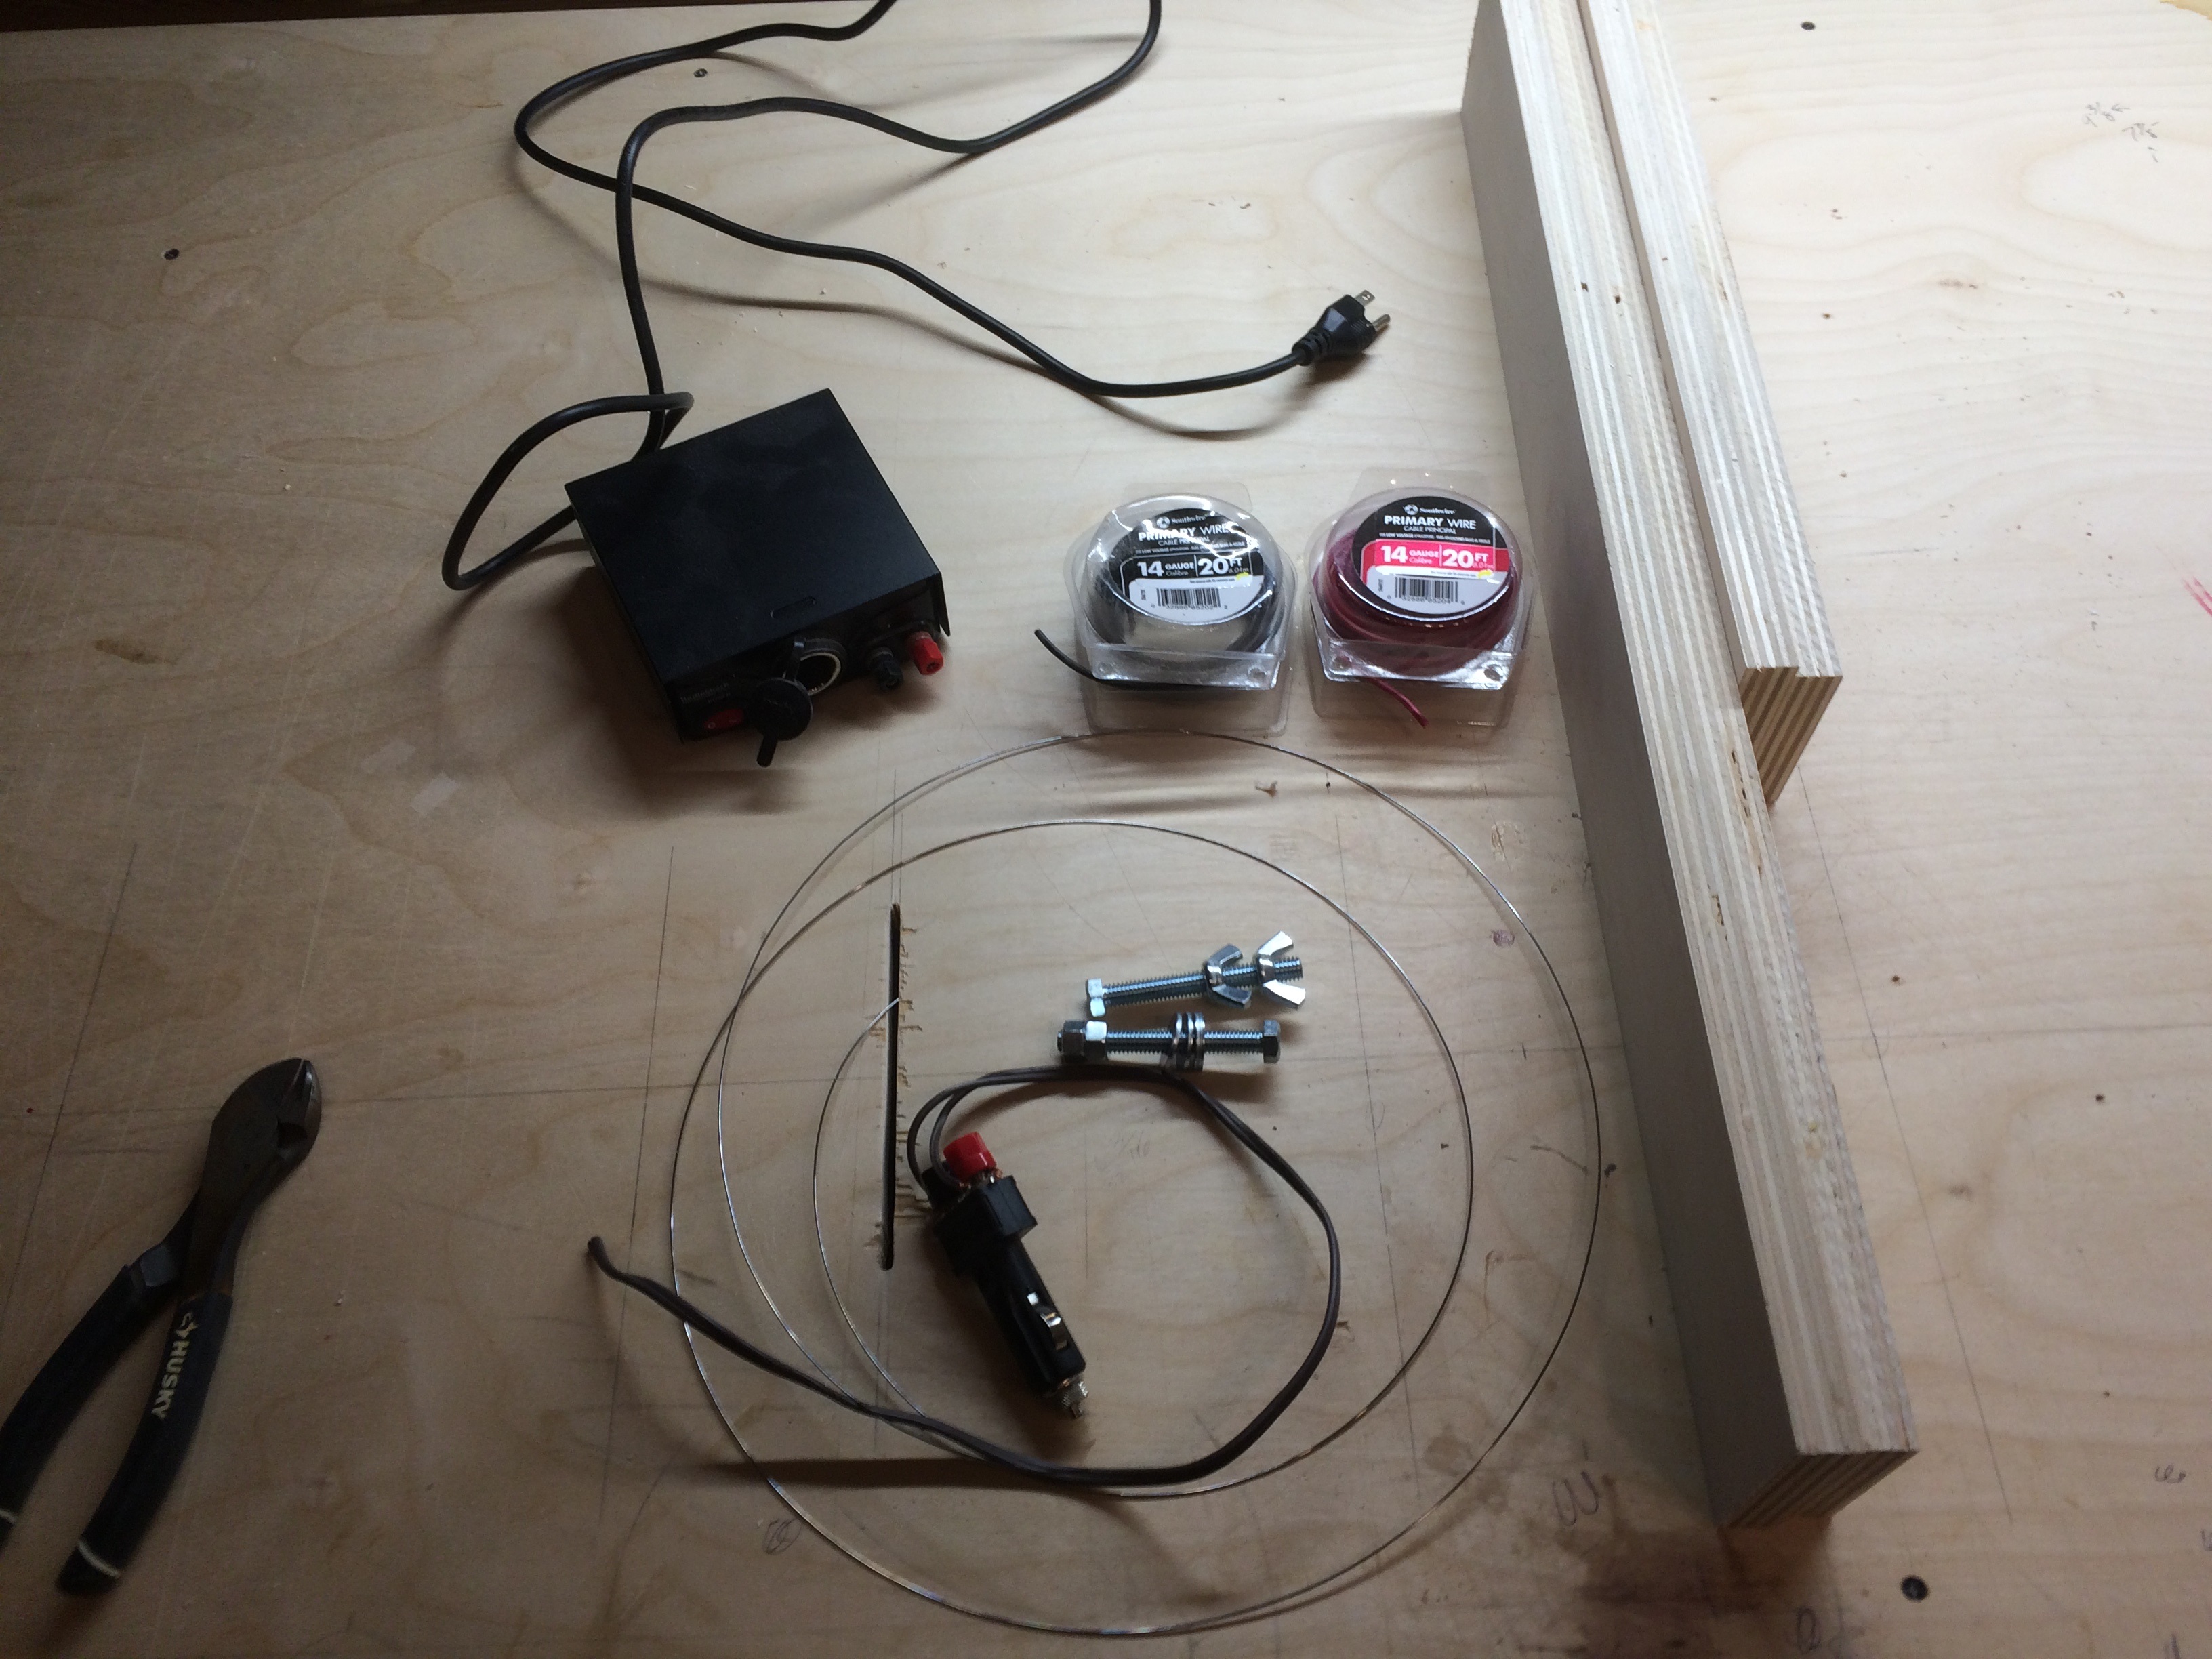
So I gathered together all that was needed for my first hot wire cut today, and with much trial and error, and a very treacherous trip to home depot in a 4 Runner with almost
bald tires, in 4" of snow, I found the correct wire, and cut my first stab!! The first power source was a garden tractor battery which proved to be way too much power, so I
connected it to a car battery charger on 2 amps, and success! I think I'll use a helper on the next cuts on one end of the bow, it's a little tricky to do by yourself.
Bob
Yes they are extremely handy and very easy to make. A few pieces of ply cut to the height you need and some pipe insulation. They really save your new fuselage
from dings, and breaking of bulkheads!
So I gathered together all that was needed for my first hot wire cut today, and with much trial and error, and a very treacherous trip to home depot in a 4 Runner with almost
bald tires, in 4" of snow, I found the correct wire, and cut my first stab!! The first power source was a garden tractor battery which proved to be way too much power, so I
connected it to a car battery charger on 2 amps, and success! I think I'll use a helper on the next cuts on one end of the bow, it's a little tricky to do by yourself.
Bob
01-09-2017, 06:31 AM
#12
I'm almost tempted to try wire cutting foam myself after seeing how easy it worked. I just don't have a power source.
You should post something over at the Golden Era Aircraft Brotherhood you can't get more Golden Era then this baby!
http://www.rcuniverse.com/forum/gold...l#post12292973
You should post something over at the Golden Era Aircraft Brotherhood you can't get more Golden Era then this baby!
http://www.rcuniverse.com/forum/gold...l#post12292973
Last edited by FlyerInOKC; 01-09-2017 at 06:33 AM.
01-09-2017, 05:27 PM
#13
Thread Starter
My Feedback: (8)
Join Date: Jan 2010
Location: sherman, CT
Posts: 202
Likes: 0
Received 0 Likes
on
0 Posts
Hi FOIKC!
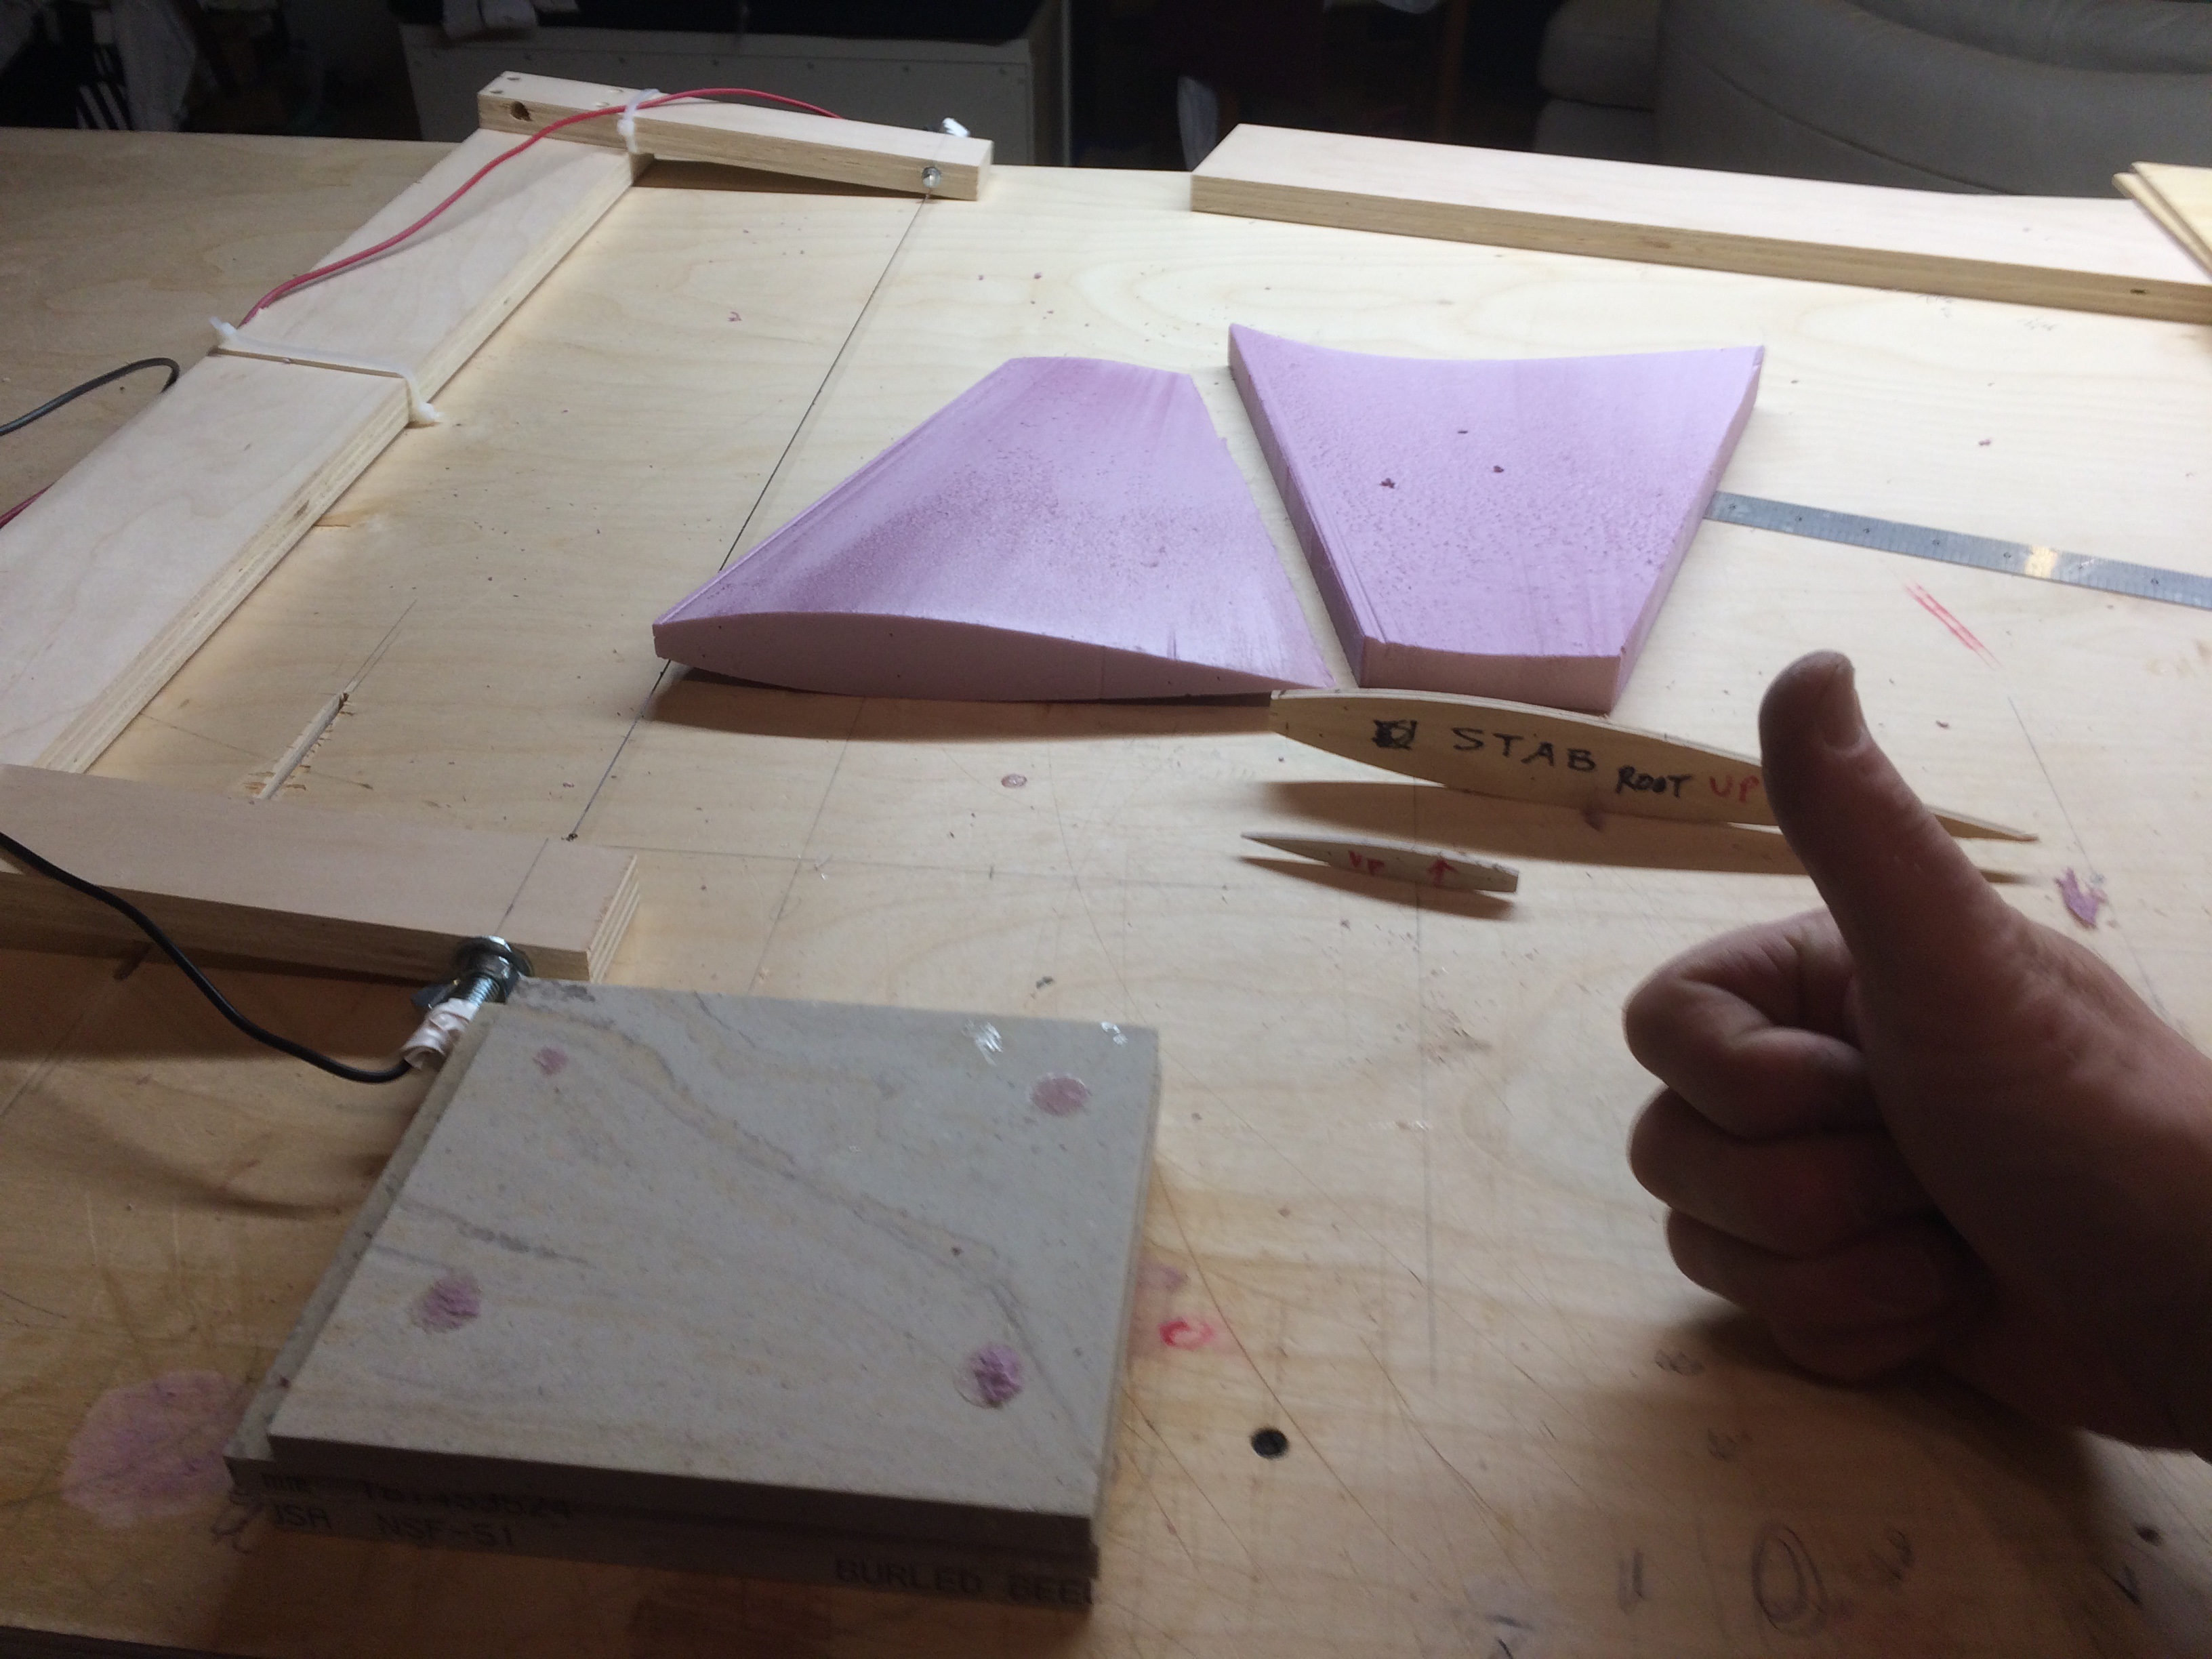
I'm going to have to rethink how easy I made the foam cutting seem... After examining the first stab attempt, I noticed that much of the foam was melted away
at the tip airfoil, due to the wire going too slow, and or stopping during the process... I spent most of a day, Sunday, retrying the cut, using all the different ways
I could think of with no luck. I believe there were 10 attempts! A tapered wing is hard to do using a bow, because its difficult to keep the wire going at a constant
speed at both ends. So I went to youtube. There was a young guy who demonstrated how to cut a tapered wing with minimal tools that you can find anywhere.
You use a pivot at one end of the wire, and only one outside template at the root. Extend the lines of the L.E and the T.E, and where they bisect is where you put the
pivot. Here's some pictures:

 Have a Good Night! Bob
I'm going to have to rethink how easy I made the foam cutting seem... After examining the first stab attempt, I noticed that much of the foam was melted away
at the tip airfoil, due to the wire going too slow, and or stopping during the process... I spent most of a day, Sunday, retrying the cut, using all the different ways
I could think of with no luck. I believe there were 10 attempts! A tapered wing is hard to do using a bow, because its difficult to keep the wire going at a constant
speed at both ends. So I went to youtube. There was a young guy who demonstrated how to cut a tapered wing with minimal tools that you can find anywhere.
You use a pivot at one end of the wire, and only one outside template at the root. Extend the lines of the L.E and the T.E, and where they bisect is where you put the
pivot. Here's some pictures:
01-10-2017, 05:26 PM
#15
Thread Starter
My Feedback: (8)
Join Date: Jan 2010
Location: sherman, CT
Posts: 202
Likes: 0
Received 0 Likes
on
0 Posts
Thanks...
Yeah I thought to myself, the time it's taken to figure out how to cut a foam core, I could have already finished the built up version! Well I've never used this method
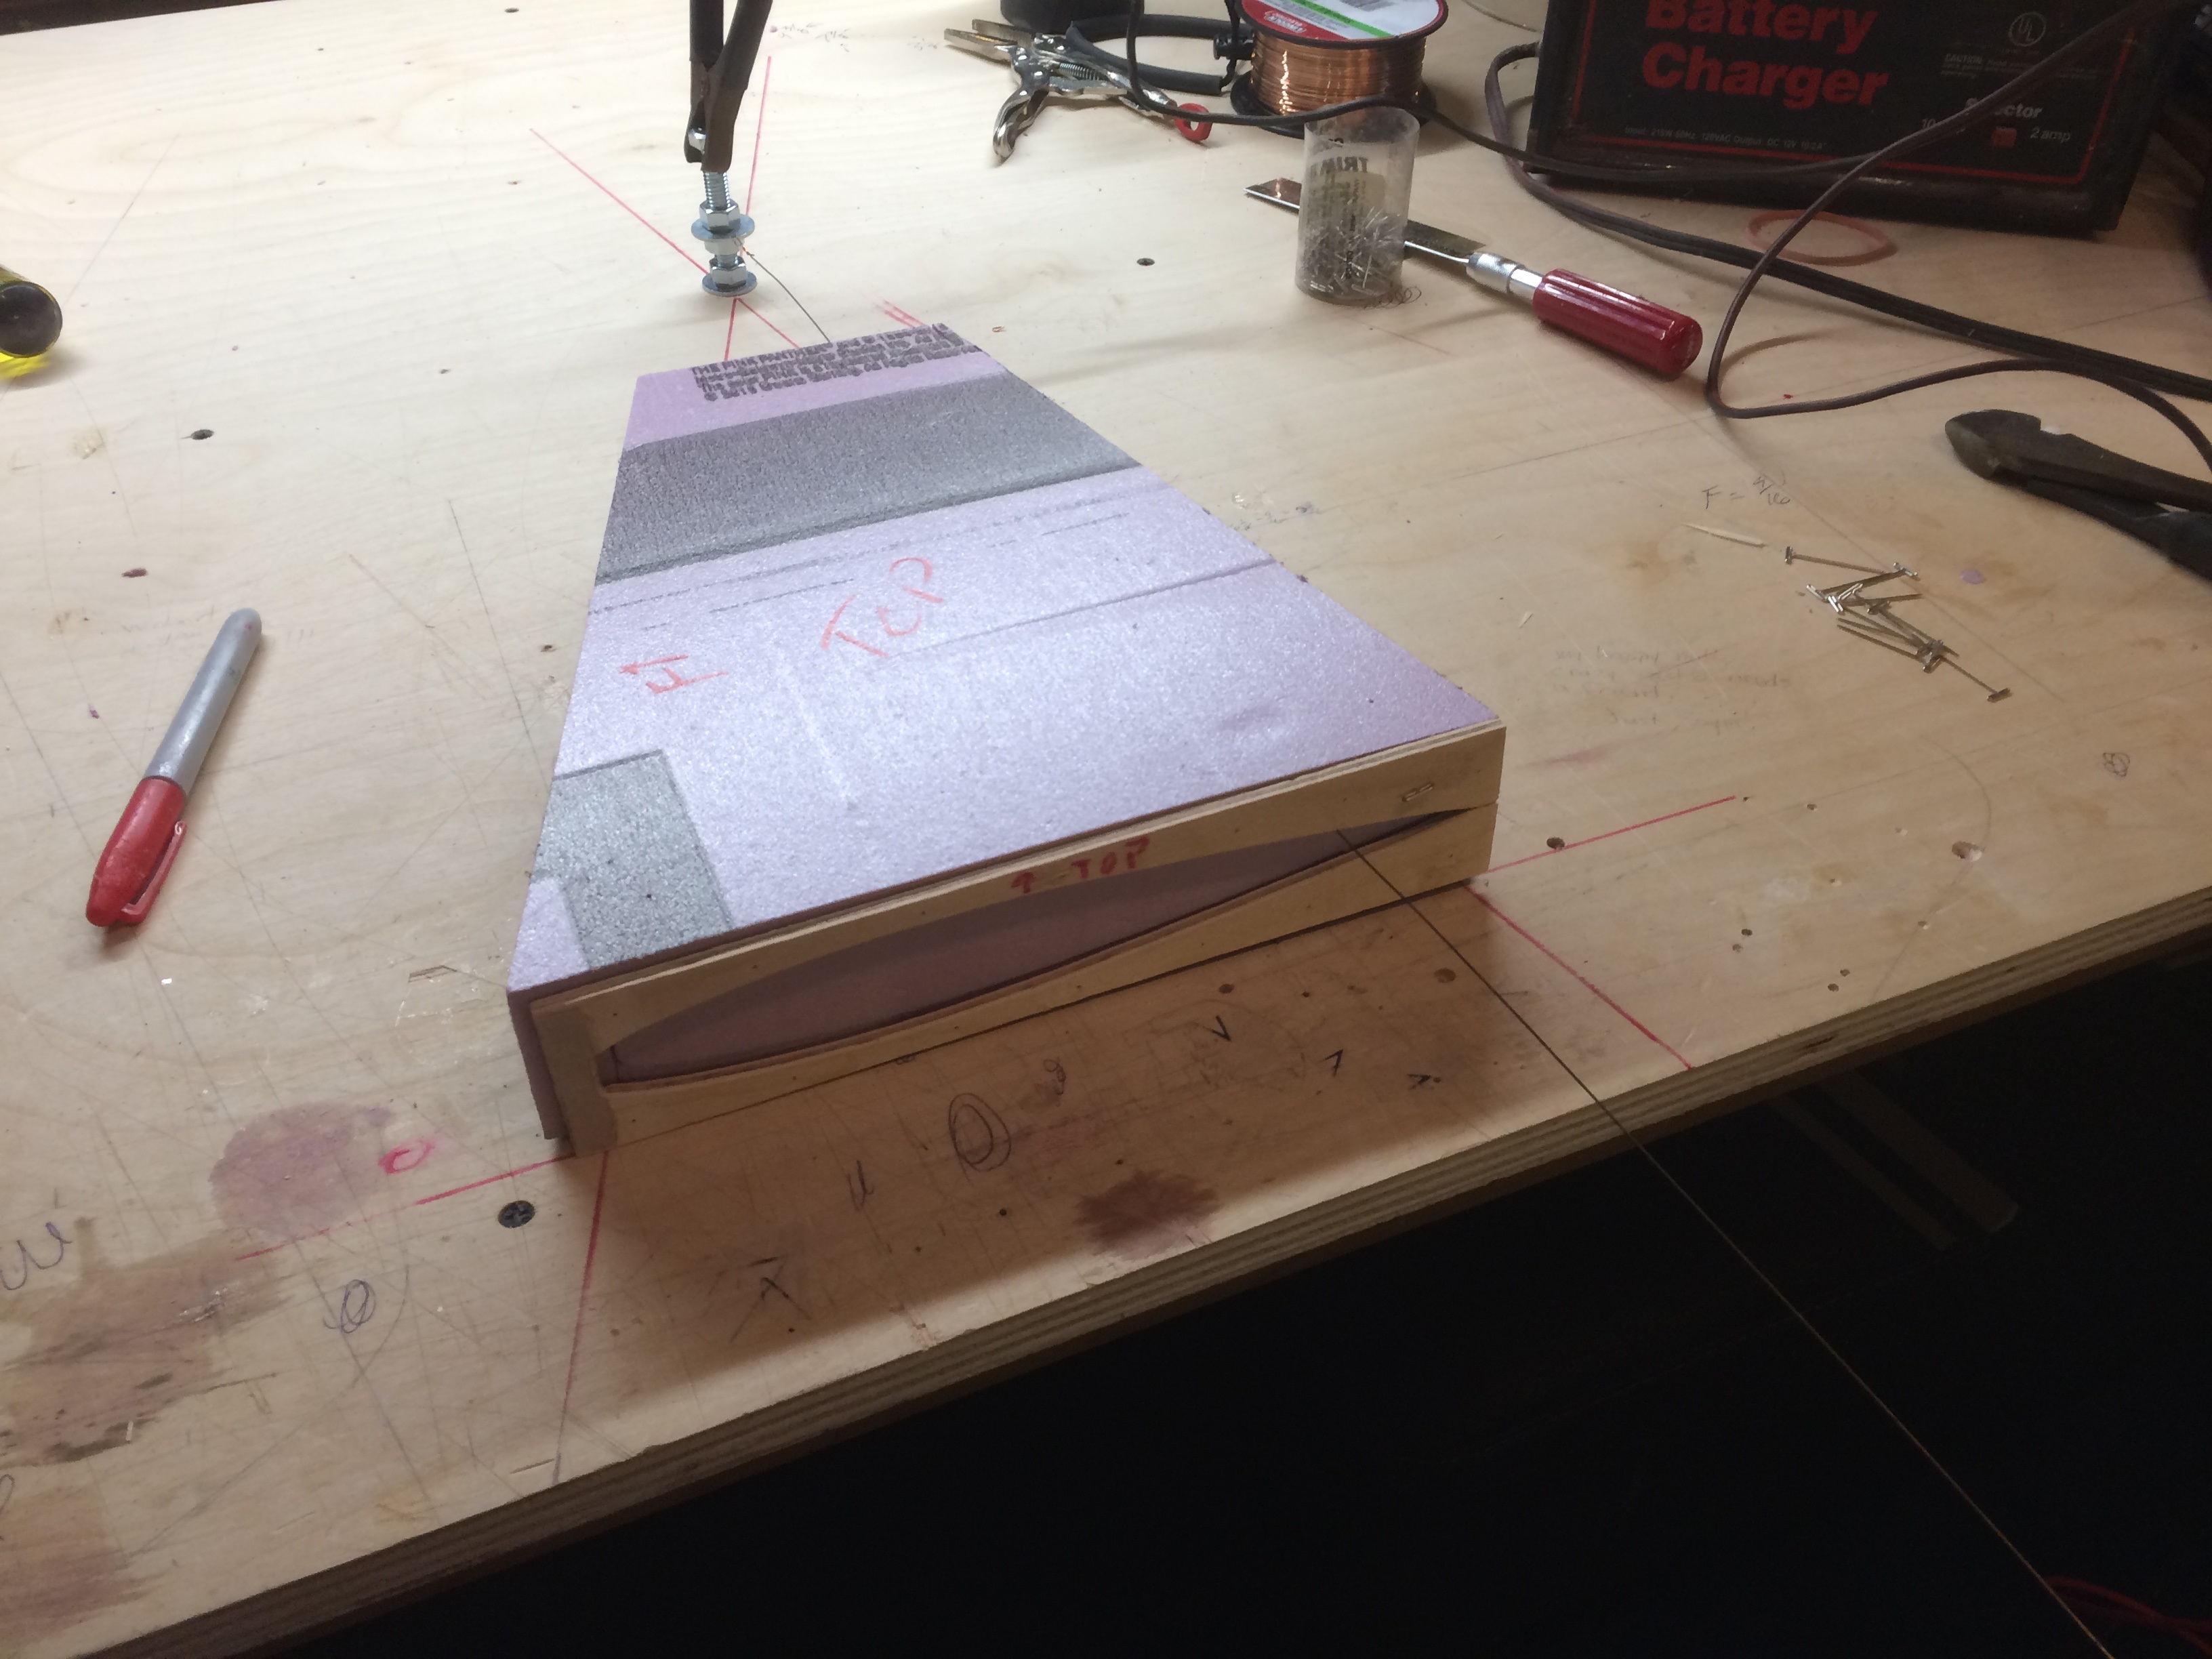
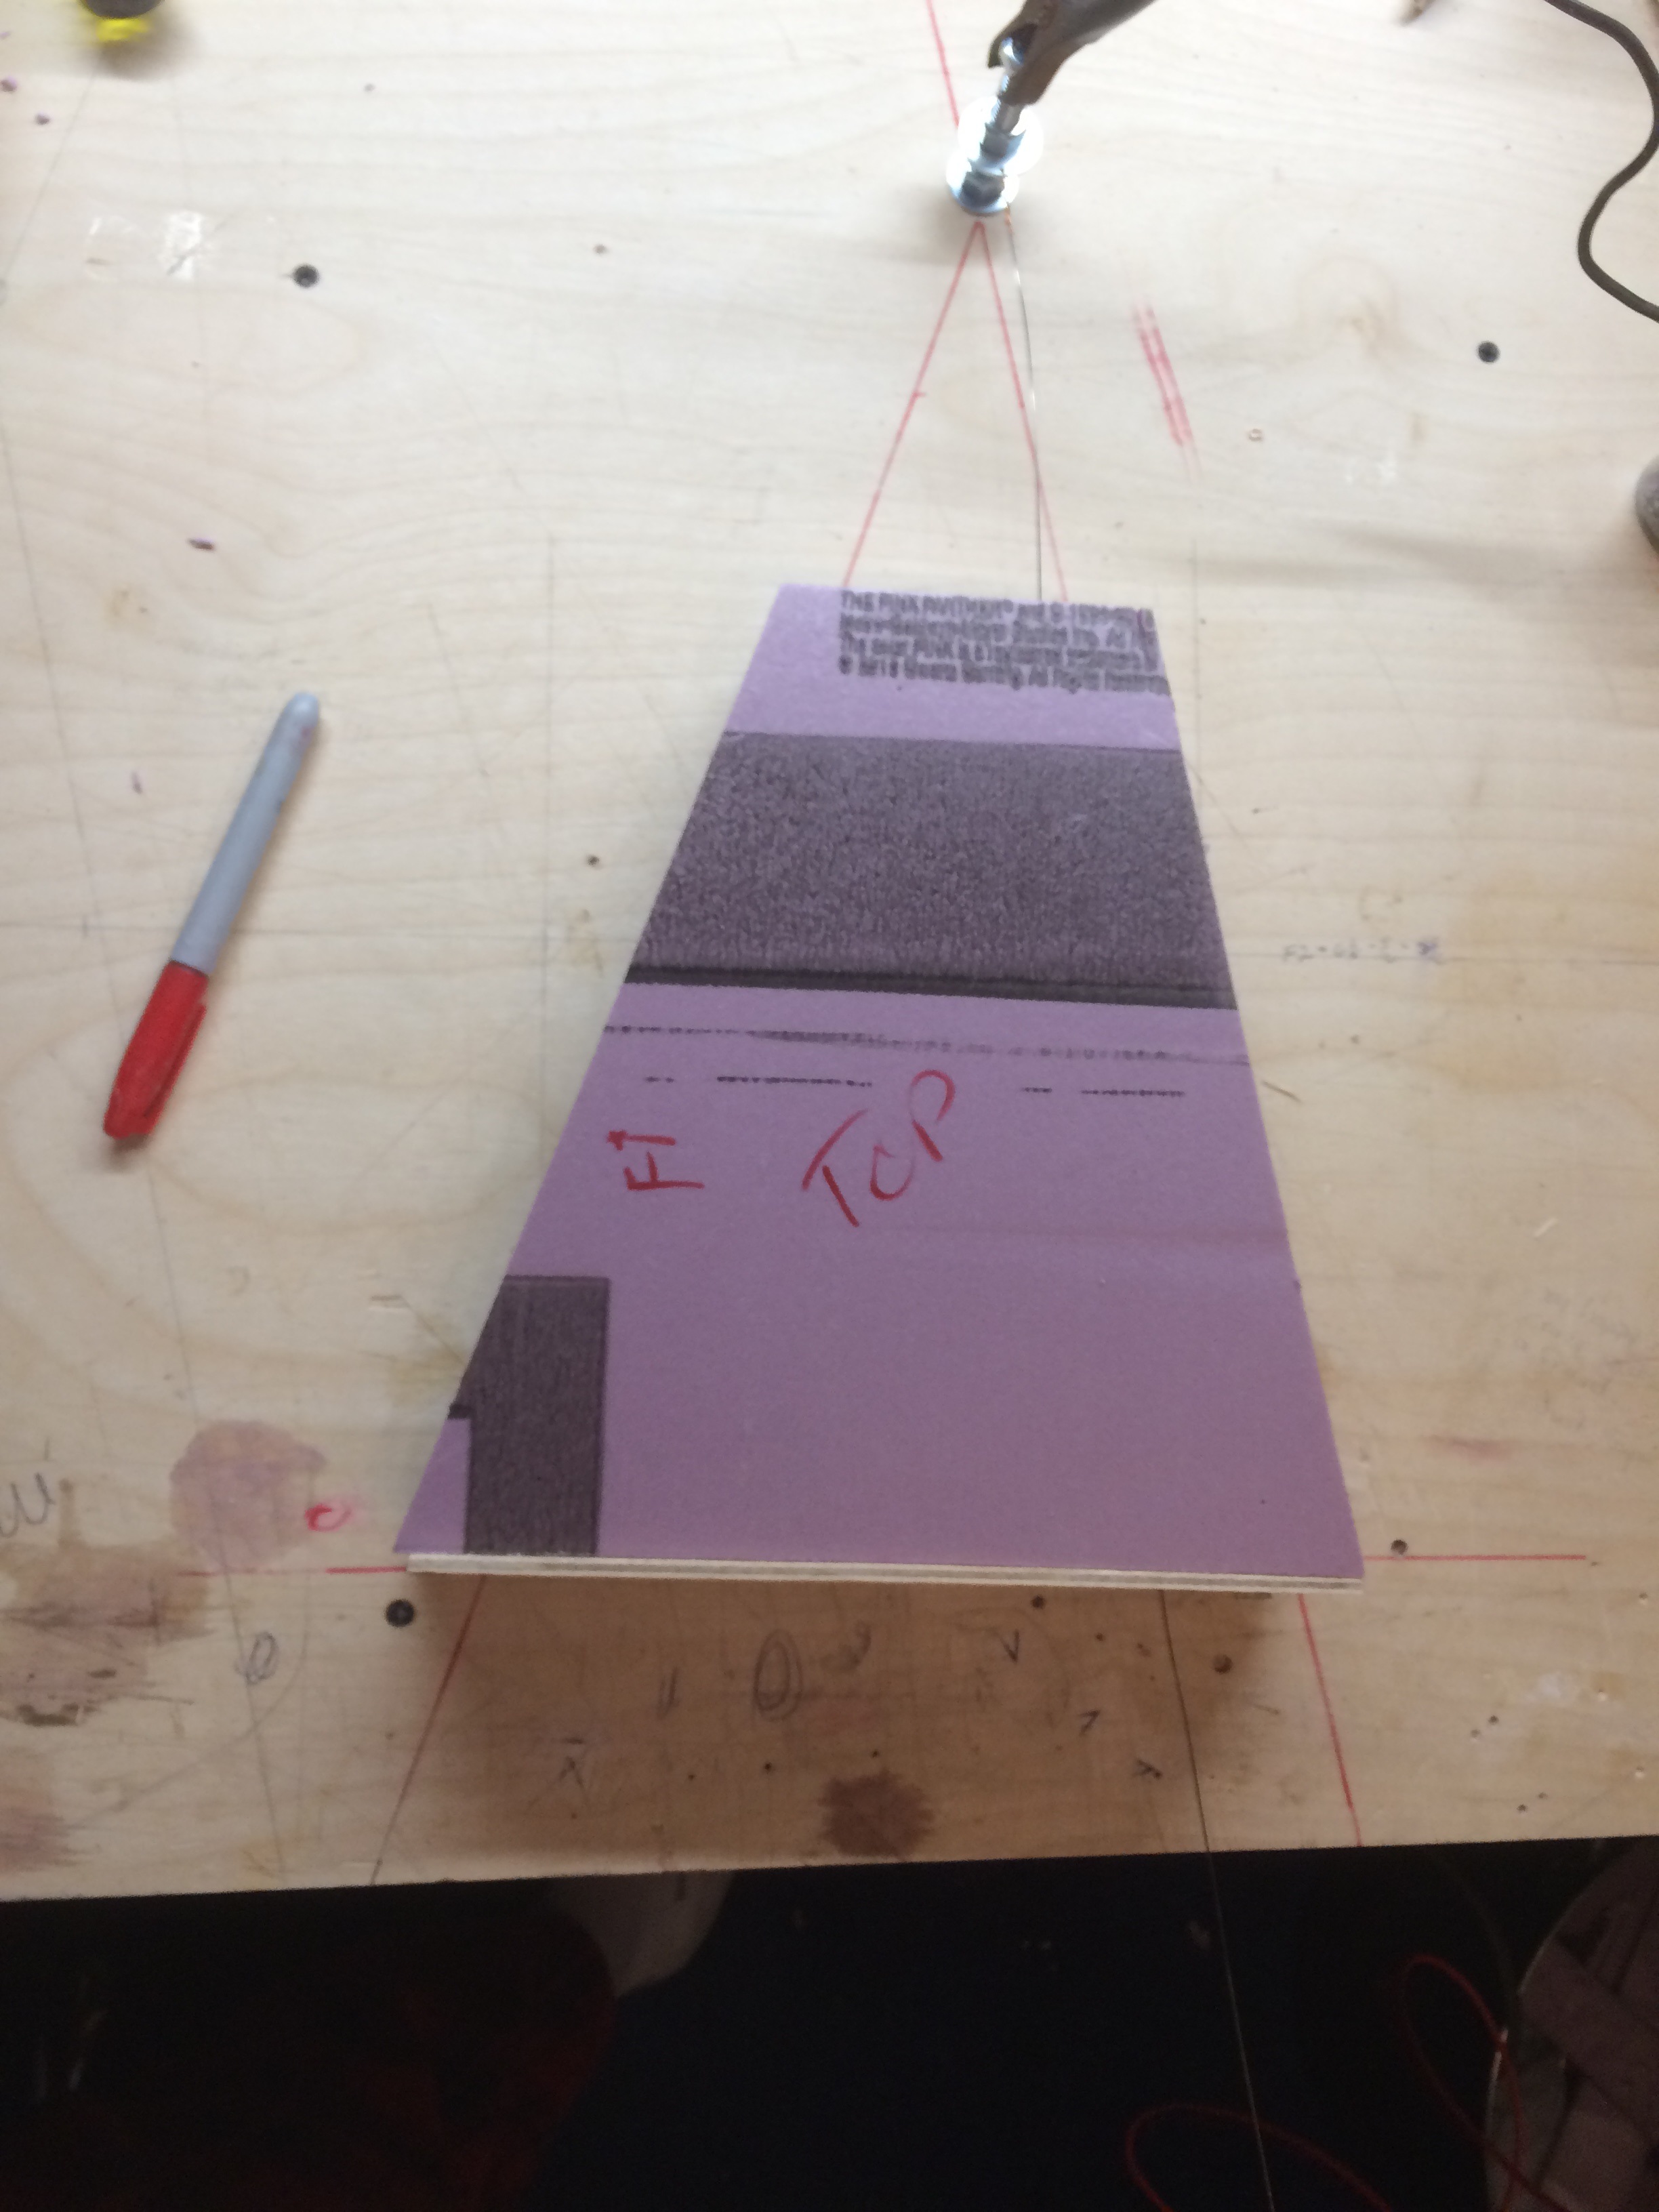
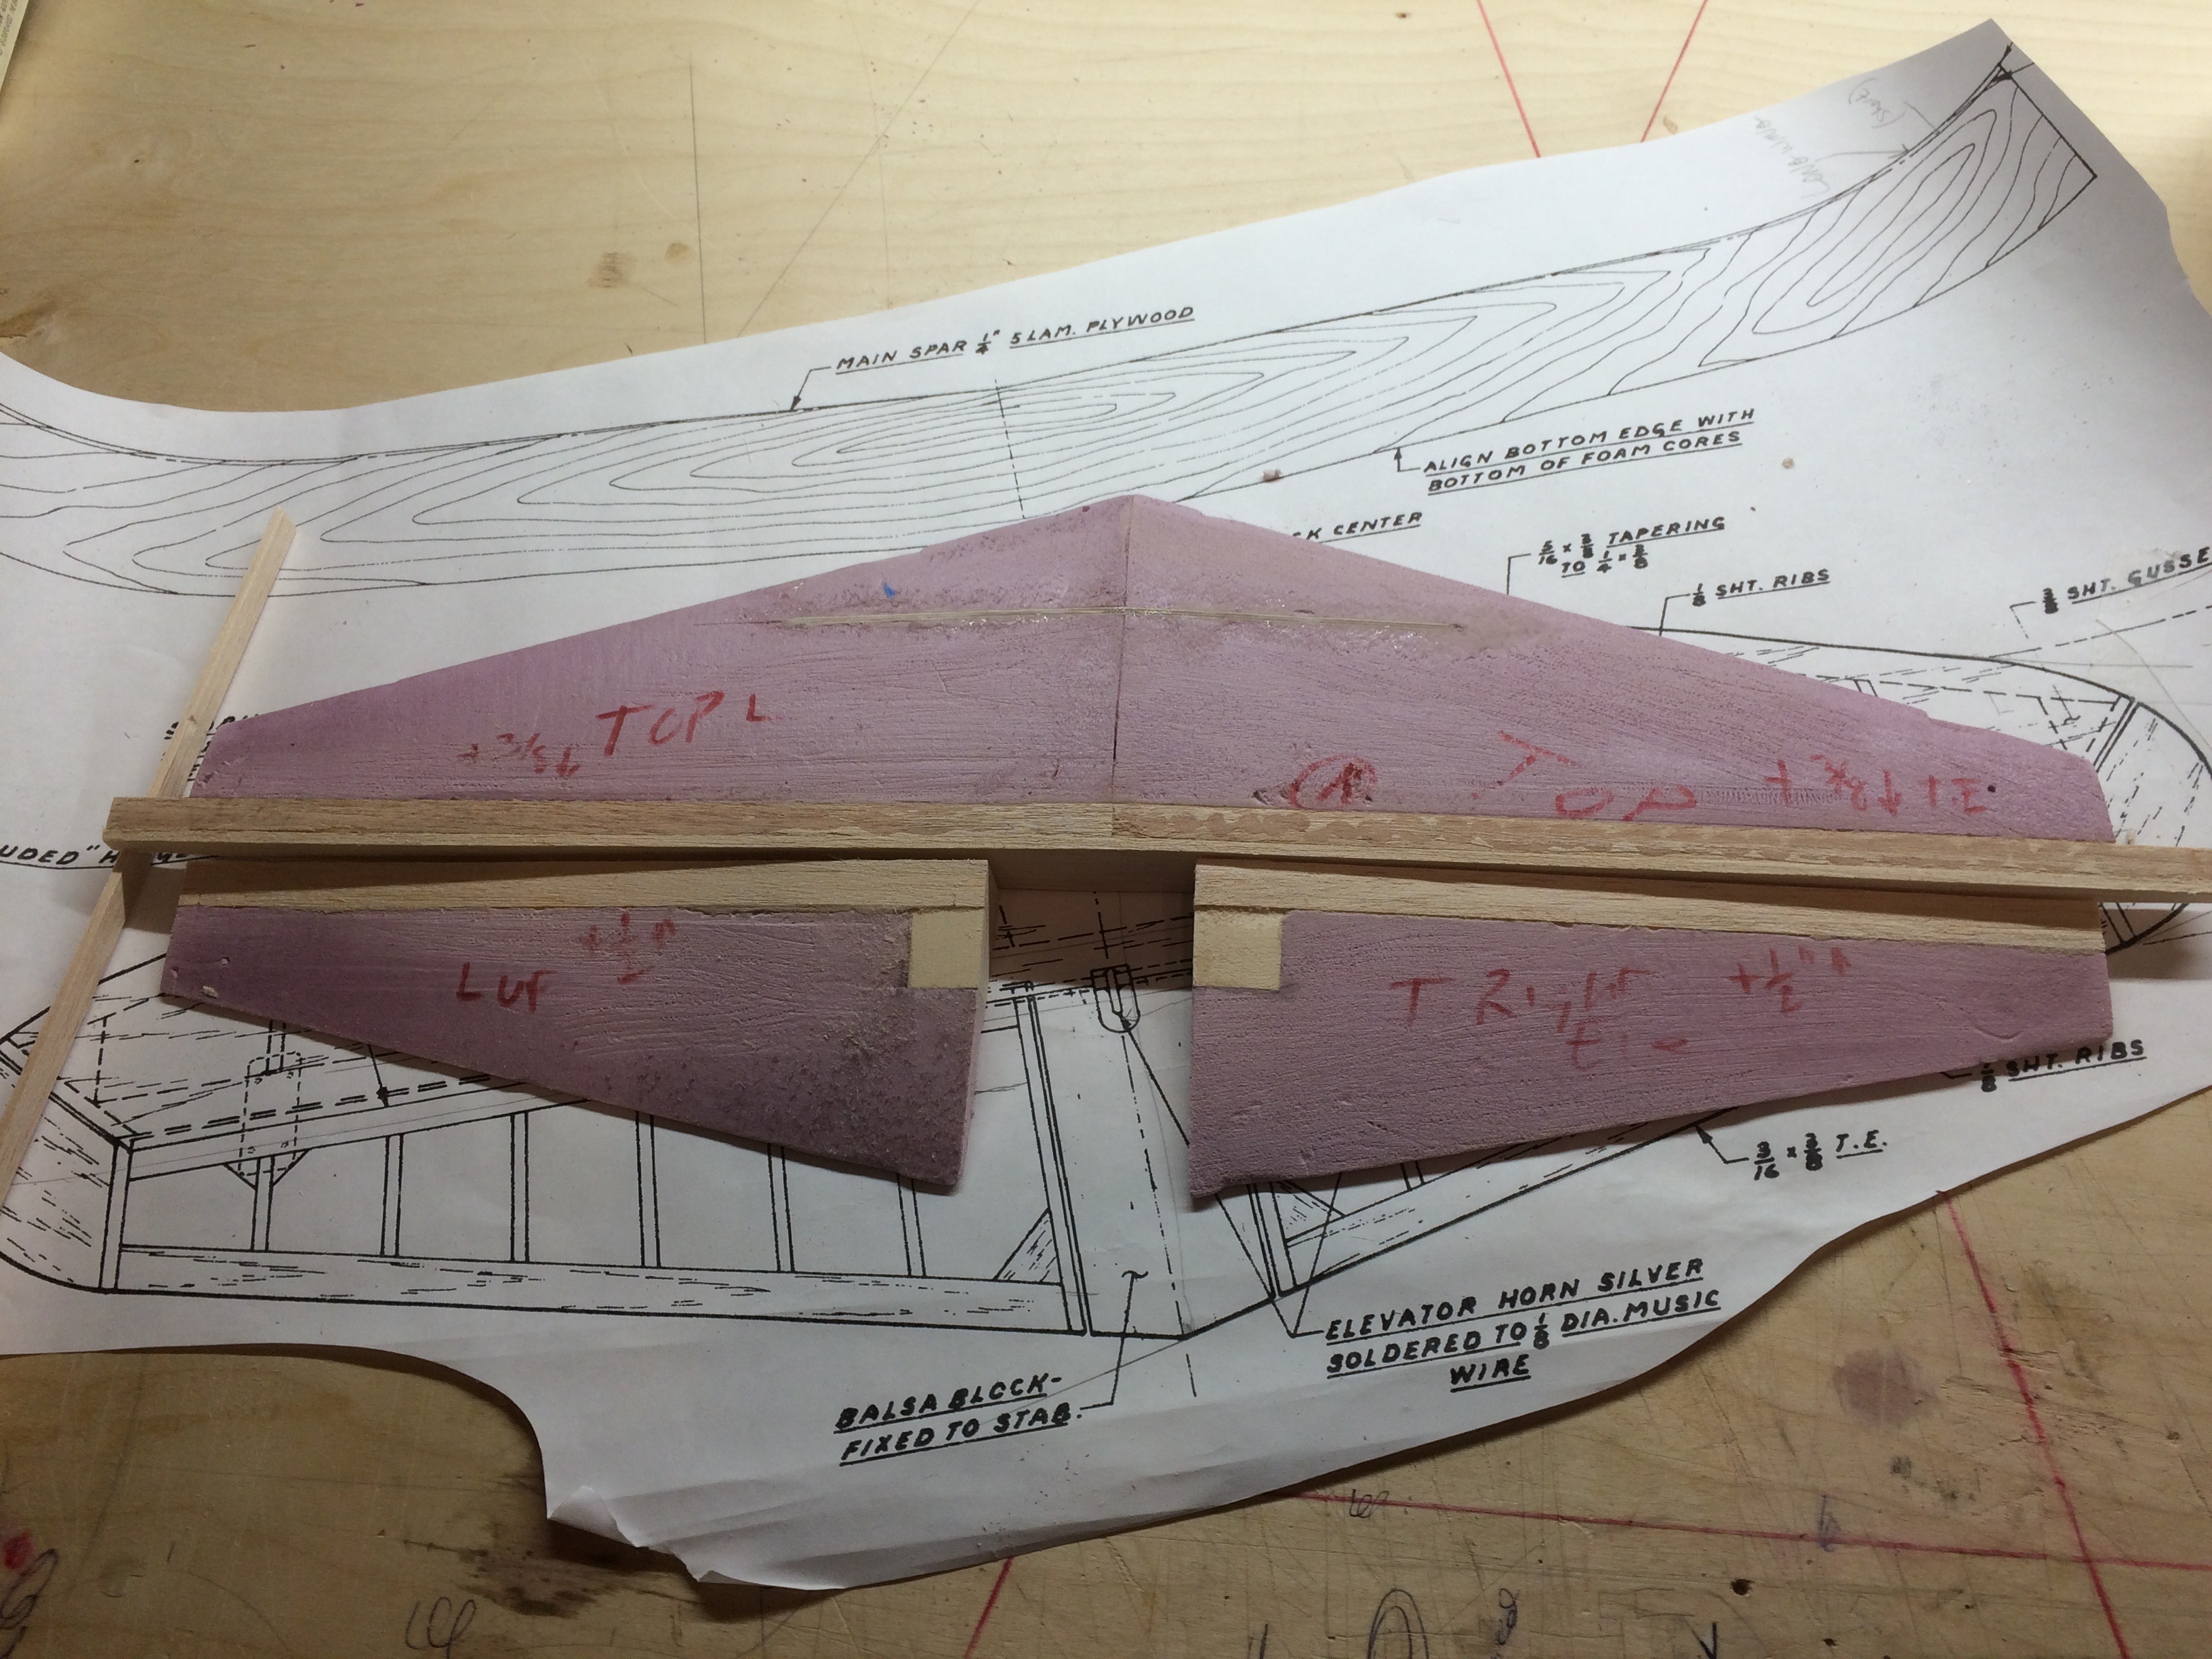
before, and the plan doesn't provide the individual rib templates, only the root and tips. The fuse actually calls for foam between all the formers, then the final shape
is sanded out of that foam. I love a good learning experience! Tonight, I joined the stab halves with a 3/32" piece of ply for a spar, then added the 3/8" hard balsa
T.E. Also installed the control horn blocks and the elevator L.E. All in all, I'm pretty happy with this method.
 RJL
RJL
Yeah I thought to myself, the time it's taken to figure out how to cut a foam core, I could have already finished the built up version!
Well I've never used this methodbefore, and the plan doesn't provide the individual rib templates, only the root and tips. The fuse actually calls for foam between all the formers, then the final shape
is sanded out of that foam. I love a good learning experience! Tonight, I joined the stab halves with a 3/32" piece of ply for a spar, then added the 3/8" hard balsa
T.E. Also installed the control horn blocks and the elevator L.E. All in all, I'm pretty happy with this method.
01-11-2017, 10:28 AM
#17
Bob, Thanks for starting this build. This plane has been one of my favorites for many years. I've never had the pleasure to see the real one or even a decent model of it. I'm signing on to watch for sure.
I'm sure you have seen Wikipedia's coverage of the H-1 . There are some great detail photos that might be of some help to you. https://en.wikipedia.org/wiki/Hughes_H-1_Racer
Tom
I'm sure you have seen Wikipedia's coverage of the H-1 . There are some great detail photos that might be of some help to you. https://en.wikipedia.org/wiki/Hughes_H-1_Racer
Tom
01-11-2017, 11:59 AM
#19
Thread Starter
My Feedback: (8)
Join Date: Jan 2010
Location: sherman, CT
Posts: 202
Likes: 0
Received 0 Likes
on
0 Posts
Hey thanks Tom
One of my favorites also.. I remember in the movie The Aviator, the actor playing Howard Hughes was looking at the riveting they were doing on the panels, and he was
demanding that they made them flush with the skin. Every one of them. The workers kinda rolled their eyes in disbelieve, unable to comprehend such a task! I really
starting looking at that plane after that movie. I always wanted to build a rc version of one, just couldn't find the right size. I think this one with the 80" wing, will be
just what I wanted.
I have seen the video of that full scale version that they were flying back to Oregon after the Oshkosh meet, I believe that the problem started in the variable pitch mechanism,
and ended up destroying the prop, and eventually the front of the plane. Sad story. It was a gorgeous reproduction. The aerodynamics and the very clean exterior of the H1 are
absolutely beautiful, I don't think there's ever been another that rivals it.
 Whatever works.


